Release Notes: FontLab 7.2.0.7622»
30 November 2020»
Highlights»
- 120 new or improved features
- New Rotate, Scale and Slant tools
- Adaptive freeform grid with Suggest distance
- Per-font rounded or fractional coordinates
- Flexible dynamic instance and 30× faster interpolation
- Powerful attached and variable components
- Visual proofing and better editing of features
- Microsoft VOLT integration
- Font window filtering by color flag and glyph name suffix
- Better UFO 3 and .glyphs 2 and 3 interchange
- 80 fixes
Warning
FontLab 7.2 uses an updated VFC/VFJ file format. If you save/export a VFC or VFJ in FontLab 7.2, you may not be able to open it in an older version of FontLab.
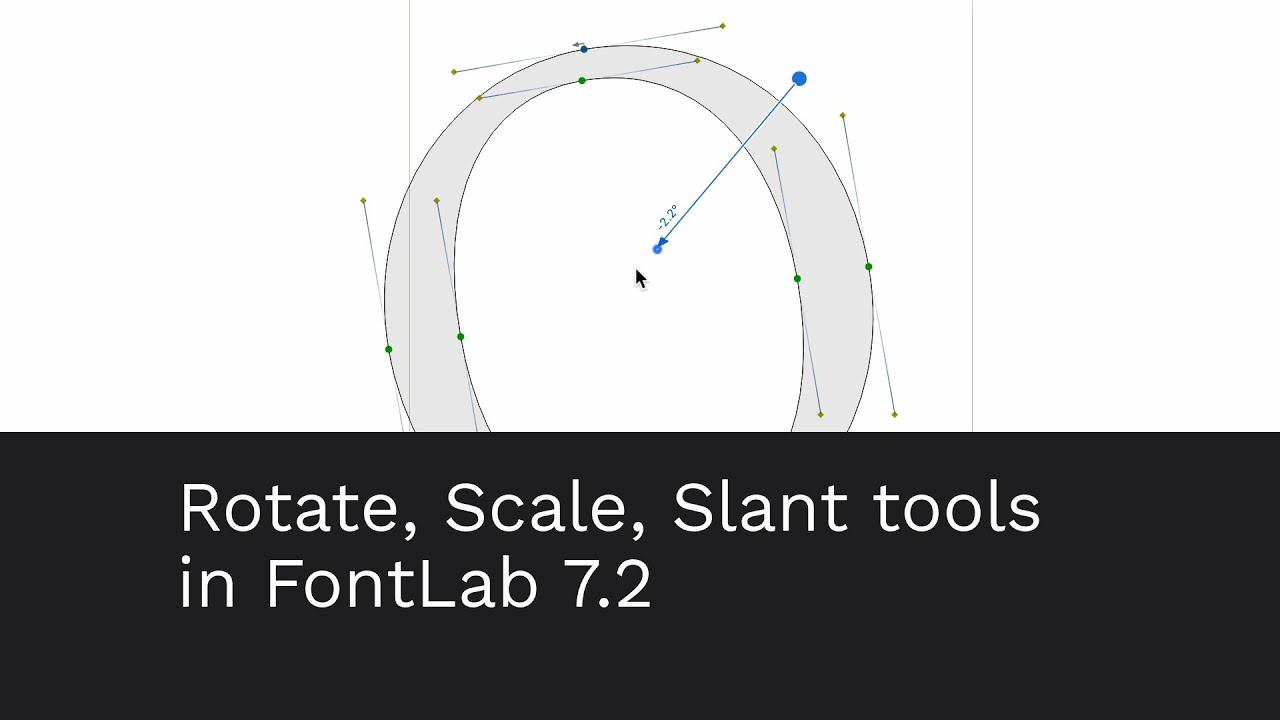
Quick transform tools: Rotate, Scale and Slant»
New In FontLab 7.2, we have revamped the quick transform tools: Rotate, Scale and Slant. They work better, and you can access them from the toolbar.
If the Element tool is active, or if a component or a complex element is current, and you activate one of the quick transform tools, FontLab will show a ■ green circle, square or rhombus. This means that FontLab will apply live, non-destructive transformation to the entire container of the current element or selected elements (the element box). It will not change the coordinates of the nodes and handles inside the element content. If the element is a reference, the transformation will affect only the current instance of the element.
If simple contour segments are selected, or a simple contour element is current, and you activate one of these tools, FontLab will show a ■ blue circle, square or rhombus. This means that FontLab will permanently modify the selected segments or the contours of the current element (the element content). It will change the coordinates of the nodes and handles, and if Font Info > Family Dimensions > Round coordinates is on, will immediately round the coordinates of nodes and handles. If the element is a reference, the transformation will affect all instances of the element.
The Tools > Free Transform tool (CmdT CtrlT) works analogically. With the Free Transform tool, you can perform multiple types of transformations at the same time.
When you transform contours or elements using the Rotate, Scale or Slant tools and View > Show > Anchors & Pins is on, FontLab no longer hides glyph anchors and pins.
Rotate tool»
To activate the Rotate tool permanently, tap the R key, or choose Tools > Transform > Rotate, or New click its icon on the Toolbar (after the Guides tool). Use the tool in one of two ways:
-
New Move your pointer (and the filled circle) to the location that will be the center of the rotation. Hold your mouse button. Drag a short distance in one direction as long as you see an unfilled circle to establish the basis vector of the rotation: this lets you decide which direction means “0°”. Drag more so the basis vector switches to the rotation vector and the arrow appears: continue dragging in any direction to perform the rotation.
-
New Click and release where you want the center of the rotation, then move your pointer (and the unfilled circle) to establish the basis vector (the 0° direction) of rotation. Then hold and drag to perform the rotation.
With both methods, hold Shift to constrain the rotation to steps of 15°.
To activate Rotate temporarily, hold R, perform the transformation, then release the key.
Scale tool»
To activate the Scale tool permanently, tap the S key, or choose Tools > Transform > Scale, or New click its icon on the Toolbar (after the Rotate tool). Use the tool in one of two ways:
-
New Move your pointer (and the filled square) to the location that will be the center of the scaling. Hold your mouse button and drag to scale the selection or element content or elements around that location. Hold Shift and drag horizontally or vertically to only scale in the X or Y direction. Hold Shift and drag diagonally to scale proportionally.
-
New Click and release where you want the center of the scaling, then move your pointer (and the unfilled circle) to define the distance that corresponds to current (100%) scale. Then hold and drag to scale. Hold Shift to scale proportionally.
To activate Scale temporarily, hold S, perform the transformation, then release the key.
Slant tool»
To activate the Slant tool permanently, tap the D key, or or choose Tools > Transform > Slant, or New click its icon on the Toolbar (after the Scale tool). Use the tool in one of two ways:
-
New Move your pointer (and the filled rhombus) to the location that will be the center of the slant. Hold your mouse button. Drag a short distance in one direction as long as you see an unfilled circle to establish the basis vector of the slant: this lets you decide which direction is treated as the “0°”, and decides whether the slanting will be horizontal or vertical. If the basis vector is closer to vertical, slanting will be horizontal, and the other way around. Drag more so the basis vector switches to the slant vector and the arrow appears: continue dragging in any direction to perform the slanting.
-
New Click and release where you want the center of the slanting, then move your pointer (and the unfilled circle) to establish the basis vector (the 0° direction) of the slant. If the basis vector is closer to horizontal, slanting will be vertical, and the other way around. Then hold and drag to perform the slanting.
With both methods, hold Alt as you drag the arrow to slant by italic angle of font master, or hold Shift to slant in steps of 3°.
To activate Slant temporarily, hold D, perform the transformation, then release the key.
Contour editing»
Duplicate nodes»
When a glyph layer has duplicate nodes (two consecutive nodes at the same coordinate), FontLab shows a red rhombus indicator. Duplicate nodes are not necessarily an error, especially if you work with multiple masters — in some masters, you may put two nodes on top of each other, and in other masters, you may move them apart.

New In FontLab 7.2, the rhombus indicator is slightly smaller.
Add nodes at inflections with Knife»
When you activate the Knife tool (J) and hold Shift near a contour, the knife indicator now “jumps” not just to extrema points but also to New inflections. Shiftclick and FontLab adds a node at the extremum or New at the inflection.
If you have multiple masters and Edit > Match when Editing is on, and you use Shiftclick with Knife, FontLab adds the node at the extremum or inflection in the current master, and adds matching nodes in all other masters at the proportional position within the matching segments, which may not be extrema or inflections.
To add extrema in all masters, use Tools > Actions > Contour > Nodes at extremes, though it may result in masters that no longer match.
Adding a node selects it»
When you add a node on the contour using the Knife (hold J and click the outline) or with CmdCtrlAltclick, New FontLab now selects the added node so you can instantly move it with the arrow keys.
Double-click a node has precedence over activating another glyph»
If the glyphs in your fonts are touching (for example in a script font) so that in the Glyph window text a node of the current glyph is on top of a node of another glyph, and if you have Edit > Edit Across Glyphs off, when you double-click the node in the current glyph, New FontLab now converts it between sharp and smooth as you’d expect. Previously, FontLab activated the neighboring glyph.
Pen tool»
FontLab 7.2 improves the Pen tool.
New When you have started drawing a new contour, you now can click on top of another contour and FontLab will not stop drawing the current contour.
When you are drawing a contour with the Pen tool and you click-and-drag, FontLab creates the current and the next segment as curve segments. Without any modifier keys, the node is smooth and the handles are symmetrical. Hold Alt to create a sharp node. New Hold Cmd to keep the opposite handle as it is and only modify the current handle (asymmetric).
Simple calculations»

In many numeric text fields within FontLab, you can perform simple calculations, e.g. enter 50*3 or 230+50. New You can now perform simple calculations in more fields:
- in the Add Oval dialog that appears when you click with the Ellipse tool
- in the Contour > Expand Contour dialog
- in the Contour > Create Parallel Contour dialog
- in the Position fields of the Anchors & Pins panel
Copy-paste»
New When you copy vector artwork in Adobe InDesign, you can now paste it into FontLab.
Coordinates»
Fractional vs. rounded coordinates»
FontLab 7 supports both fractional and rounded (integer) coordinates in:
- objects in the glyph layers: nodes, handles, component positions, anchors, element guides, glyph guides, hints
- objects in the font master: font guides and zones
Glyph metrics, kerning values and font dimensions are always rounded (integer).
- Most development font formats (VFC, VFJ, UFO,
.glyphs) support both rounded and fractional coordinates. FontLab’s built-in export profiles for these formats keep fractional coordinates on export. Even if your masters use integers, exported instances will have fractional coordinates. To force rounded coordinates in exported instances, customize these profiles: change Round coordinates to UPM grid to Round nodes and handles to integers. - Some formats such as OpenType PS (.otf), OpenType PS+SVG and Type 1 support both rounded and fractional coordinates for nodes, handles, hints and zones — but not for anchors. FontLab’s built-in export profiles for OpenType PS and Type 1 round coordinates to integers on export. You can customize these profiles: change Round coordinates to UPM grid to Keep fractional nodes and handles.
- Other formats, such as OpenType TT (.ttf) and VFB only support rounded coordinates everywhere. The Round coordinates to UPM grid export profile setting has no effect on these formats.
FontLab’s classic font editors had varying support for fractional coordinates: Fontographer allowed them, while FontLab Studio and TypeTool only worked in rounded coordinates.
Most type designers prefer to work so that at the end of the process, their fonts only use rounded coordinates. But in the design phase, strictly rounded coordinates have limitations: when you scale contours up and down, rotate them or slant them slightly, coordinates are rounded to the integer UPM grid every time, so rounding errors can accumulate.
Fractional coordinates are helpful to avoid this. They are helpful when you design ornamented glyphs or symbols and icons that are full of intricate details. They are also helpful when you import/paste vector artwork from other apps (such as Illustrator), and have not yet decided how large they should be within the UPM size.
However, when you export fractional coordinates to a format that supports them, the font file will be significantly larger than if you export rounded coordinates.
Working in rounded coordinates»
In previous versions of FontLab, if you turned on Contour > Coordinates > Round when Editing, FontLab restricted all editing operations in all currently open fonts to rounded coordinates. When you turned it off, all editing operations in all currently open fonts were in fractional coordinates. This was not satisfactory: if you had multiple fonts open, and only one needed fractional coordinates, you had to keep remembering to toggle Round when Editing when you switched the fonts.

New In FontLab 7.2, we have replaced Round when Editing with a per-font setting and a preference for defaults. Contour > Coordinates > Round when Editing is still in the menu, but it no longer has any function, it only shows an information dialog. We will remove this menu item in a future version.

When you turn on Font Info > Family Dimensions > Round coordinates, and click Apply or OK:
- FontLab rounds all fractional coordinates in the font (if there are any), and marks the affected glyphs in the Font window with a gray bar that indicates that the glyph has been modified.
- All future editing of this font will be in rounded coordinates.
- Contour > Coordinates > Preview Rounding is grayed out.
- When you save the VFC/VFJ, FontLab remembers that setting.
This is equivalent to the situation when you turned on Round when Editing and also ran the Apply rounding action in all glyphs.
In addition, we’ve ensured that font guides, zones and hints are also rounded when Round coordinates is on — previously, this was not always the case. Hints with the fractional part .5 are not rounded: in Adobe fonts that use integer coordinates, a hint that goes through the middle of a slightly tilted horizontal or vertical line segment is used to align that segment. If the height/width
of the tilt has an odd value, the hint in the middle has a “half” value.

Turn on Preferences > Open Fonts > Round coordinates to use rounded coordinates as default in new and opened fonts. If the preference is on, and you open a VFC/VFJ file saved in an older version of FontLab, or a font file in another format, then if that font has fractional coordinates, FontLab shows a Coordinates Rounding dialog:
- Click Keep fractional, and FontLab will open the font without changes, and will turn off Font Info > Family Dimensions > Round coordinates.
- Click Round, and FontLab will round the coordinates, will turn on Font Info > Family Dimensions > Round coordinates, and will print the names of the affected glyphs in the Output panel.
Turn the preference off to use fractional coordinates as default.
When you open a VFC/VFJ saved in FontLab 7.2, FontLab respects the stored Font Info > Family Dimensions > Round coordinates setting and does not show the warning, regardless of the preference.
When you open a TTF font that has glyphs that consist only of off-curve points, FontLab needs to insert one node (on-curve point). If the preference is on, FontLab will also show the Coordinates Rounding dialog. Choose Round to make sure that FontLab inserts the node at a rounded position.
Working in fractional coordinates»
New When you turn off Font Info > Family Dimensions > Round coordinates, this is equivalent to when you turned off Round when Editing.

When Contour > Coordinates > Preview Rounding is off, FontLab works in fractional coordinates, both on screen and internally. This gives you the highest precision, but when you export to some formats, FontLab will round the coordinates in the final fonts.
When Contour > Coordinates > Preview Rounding is on, FontLab internally works in fractional coordinates, but draws and previews the contours with coordinates rounded to integers.
This is similar to the pixel preview in apps like Adobe Illustrator. When you use this method, you need to remember that the results on screen are dynamically rounded, so the underlying distances between nodes, handles and other objects, may be slightly different. In this mode, transformations are completely lossless. When you export to some formats, FontLab will round the coordinates in the final fonts, but with Preview Rounding, you always see that result while you work.
Turn off Preferences > Open Fonts > Round coordinates to use fractional coordinates as default in new and opened fonts.
When you work in rounded coordinates, turn off Font Info > Family Dimensions > Round coordinates to work in fractional coordinates for some time. This is useful when you, for example, want to perform a series of transformations and minimize the rounding error accumulation. Turn on Contour > Coordinates > Preview Rounding to simulate the visual result of rounded coordinates.
When you work in fractional coordinates, you can still use Contour > Coordinates > Apply Rounding to round to integers in the current layer, or use Tools > Actions > Contour > Apply rounding to round many glyphs and layers to integers. This is useful when you want to “freeze” some glyphs to rounded coordinates. Or turn on Font Info > Family Dimensions > Round coordinates, and click Apply or OK, to apply rounding in the entire font.
Increasing the precision of coordinates»
To get higher precision in your design, you can also set Font Info > Family Dimensions > Units Per eM to any value up to 16,384.
- For most projects, use a “typical” Units Per eM size such as 1000, and rounded coordinates.
- To get higher precision even in OpenType TT fonts, use a higher Units Per eM size, and rounded coordinates. For example working at 10,000 with rounded coordinates is equivalent to working at 1000 with single-decimal fractional coordinates.
- To get even higher precision and lossless transformation during editing, use either a “typical” Units Per eM size such as 1000, or a higher UPM, and also fractional coordinates.
In Font Info > Family Dimensions > Units Per eM > Change…:
- New You can now enter the maximum value
16384as permitted by OpenType. Previously, the dialog allowed the maximum value of10000. - New When you choose Scale glyphs and metrics to the new UPM value and click OK, the scaled glyph content will have rounded or fractional coordinates, depending on the state of the Round coordinates checkbox in Font Info > Family Dimensions.
Sketchboard coordinates»
Editing on the Sketchboard was previously subject to the Round when Editing setting as well, which caused confusion. For example, you can use Sketchboard to import or paste an entire-alphabet
in vector .ai, .eps or .pdf form, or in bitmap form that you then autotrace. In those cases, if Round when Editing was on, FontLab immediately rounded the coordinates.
However, the imported artwork may have had arbitrary scale. You then would split the artwork and place as glyphs into a font. It’s only useful when the glyph coordinates are rounded at that point.
New Therefore, in FontLab 7.2, Sketchboard always uses fractional coordinates, but you can turn on Preview Rounding to simulate the rounding, or Apply Rounding to round the content of the Sketchboard to integer coordinates. If you copy-paste or place the artwork from Sketchboard into a font that has Round coordinates on, FontLab will then round the coordinates.
Guides and snapping»
Suggest distance»
New When you turn on View > Suggest > Distance, and you drag a node, handle, selection or anchor, FontLab now draws a temporary suggested outline at the distance defined in Font Info > Other Values > Contour properties > Suggest distance. This is like having a freeform grid that adapts to your current drawing.

- You can define separate horizontal (x) and vertical (y) distances, separately for each master.
- If the distance is a positive number, the suggested outline appears outside the existing closed contours, and to the right of open contours.
- If the distance is a negative number, the suggested outline appears inside the existing closed contours, and to the left of open contours.

Use Suggest Distance to position anchors at a specified distance from existing contours, or to transform the existing drawing, especially if you turn on Contour > Power Nudge, to quickly produce a bold or a condensed variant.
- When you drag a point or anchor, it snaps to the suggested outline.
- When you select some points or segments and start dragging a point (node or handle) of that selection, that point snaps to the suggested outline.
- When you select some points or segments and start dragging the outline, FontLab chooses the nearest node of the selection as the snap point, and that snap point snaps to the suggested outline.
- When you select one or more anchors and start dragging one of them, that anchor snaps to the suggested outline.
Note
To quickly achieve consistency across your design, you can combine Suggest distance with View > Suggest > Stems. Stem suggestions are like an adaptive grid that appears at the horizontal or vertical distance equal to any stem defined in Font Info > Stems. Distance suggestions are freeform: they use a predefined distance, and appear outside or inside an existing contour.
Slanted guides»
If the font has the Italic angle defined in Font Info > Font Dimensions, you can now New quickly create new guides that are slanted by the italic angle. Turn on View > Rulers, then:
- to create a slanted glyph guide, hold Cmd Ctrl and drag the guide from the vertical ruler
- to create a slanted font guide, hold ShiftCmd ShiftCtrl and drag the guide from the vertical ruler
Power guides»
When you use the Magnet tool (U) to link a node to a guide (or hint or zone, which are special types of guides), the guide becomes a Power guide. When you drag it, the nodes follow.
Previously, you could link nodes to a particular type of guide (glyph guide, font guide, hint, zone, font dimension) only if View > Snap was turned on for that type of guide. New In FontLab 7.2, you can link nodes to any types of guides with Magnet, regardless of the snapping setting.
New When you create a power guide and immediately move it with arrow keys, FontLab 7.2 now moves the linked nodes as expected.
When Font > Live Update > Live Metrics is on and you have expressions in the glyph metrics, whenever you drag a power guide, FontLab updates the metrics after a small delay. New FontLab 7.2 also updates them when you use the arrow keys to move a power guide. Previously, you needed to choose Font > Update Glyphs.
Snap to baseline»
When you draw or edit contours, the pointer snaps to the glyph baseline when View > Snap > Font Dimensions is on, and New now also when View > Snap > Glyph Metrics is on.
FontAudit»
When you open the FontAudit panel, FontLab runs some tests and shows a list of potential problems in the current layer of the current glyph. Turn on View > Show > FontAudit to visualize the problems directly in the Glyph window. Turn on/off the tests that FontAudit should perform in Preferences > FontAudit.
In Font window, you can select glyphs and choose FontAudit Glyphs to check for the problems in the current layer of the selected glyphs. FontLab will show a red corner mark in all glyphs there it found problems. Click the glyph cells to see the problems in the FontAudit panel.

Previously, in the FontAudit panel, you could click a Fix icon next to each problem to fix it, and you could click Fix All to fix all listed problems in the current glyph layer. New In FontLab 7.2, you can also click a problem in the list and then click Fix Similar to fix that problem and all other problems of the same type in the current glyph layer.
Glyph window text, font size and wrapping»
Text in Glyph window»
In the Glyph window, you can show a single glyphs, a few glyphs or long text portions.
- Turn on the Text tool and type or paste any Unicode text into the window.
- Turn on View > Control Bars > Text Bar or open the sidebar and use the large text box to type or paste glyphtext: Unicode characters or escaped sequences:
/-prefixed glyph names or Unicode characters with suffix,\u-prefixed hex Unicodes. Put a space or another escaped sequence at the end of an escaped sequence. - Use the Text dropdown in the property bar or sidebar to show one of the texts predefined in Preferences > Text. New In FontLab 7.2, the dropdown in the sidebar now uses the same design as the dropdown in the property bar.
- Turn on Kerning panel and click a pair to put it into the window text, or hold Shift or Cmd to put multiple pairs. To replace the window text with a combination, use Ctrlclick (1st class and 2nd glyph), Altclick (1st glyph and 2nd class), Altclick the small gray rectangle (1st class and 2nd class).
- Turn on Pairs & Phrases panel and choose Pairs or Texts in the bottom-left, then click a phrase or Shift/Cmd-click multiple phrases to put them into the window text.
- Tap /, type a glyph name portion and choose a glyph. Tap Enter to replace the current glyph with the chosen glyph. Tap CmdEnter CtrlEnter to insert the chosen glyph after the current glyph.
Glyph size in Glyph window»
Just like in a word processor or web browser, the size of the glyphs you see in the Glyph window depends on two factors:
Font size in points. You can set the font size in the property bar or the sidebar.
Zoom level, which you can change with View > Zoom, with keyboard shortcuts, or gestures.
- To zoom in, tap Z or Cmd+ or Ctrl+, or hold Alt and scroll up the trackpad or mouse wheel. Preferences > Distances controls the speed of zooming.
- To zoom out, tap X or Cmd- or Ctrl-, or hold Alt and scroll down the trackpad or mouse wheel.
- To zoom freely, click the 3rd zoom button in the bottom-right, or hold CmdSpace CtrlSpace, and then drag. You can also use the pinch gesture if the setting in Preferences > Distances allows it.
- To see the glyphs at their defined font size, choose View > Zoom > Actual Text Size (Cmd1 Ctrl1).
- In Preferences > Distances, you can define how FontLab interprets the View > Zoom > Zoom 100% zoom level (Cmd3 Ctrl3). The 100% zoom level can either fit the glyphs vertically between specified dimensions, or zoom so that the glyphs are at a specified font size in points. This settings also affects the other %-based View > Zoom levels.
Glyph window wrapping»
The portion of the Glyph window where FontLab shows the glyphs is the canvas. With Text > Wrap, you can decide how FontLab wraps the text that it shows in the canvas.
Manual: The canvas has essentially an infinite width. Any text that does not have explicit line breaks forms one text line. To introduce line breaks, choose the Text tool, place the text cursor
at the intended line break and press Enter, or use \n in the glyphtext.
Auto: The canvas has a fixed width equal to the width of the visible portion of the canvas at the Actual Text Size zoom level (Cmd1 Ctrl1). The width of the canvas changes when you resize the window and when you turn the sidebar on/off. When Text > Wrap is Auto, FontLab breaks the lines automatically at the canvas width.
When you change the font size with Auto wrap, the text in the window reflows: more glyphs fit into one line if you decrease the font size, fewer glyphs fit if you increase it. Zooming in and out don’t cause a reflow. So the Glyph window behaves more like a word processor or web browser. When you choose the Text, Metrics or Kerning tool, FontLab shows the canvas width when you zoom out further than the Actual Text Size zoom level.
With Auto wrap, the text also reflows when you switch between masters that have different width, or when you choose the Text tool and use the Variation panel map or sliders.
Apply Glyph window wrapping»
New In FontLab 7.2, you can use the benefits of automatic wrapping without the reflow. To do this:
- Select some or all glyphs in Font window and open a Glyph window, or paste a longer text into the Glyph window.
- Set Text > Wrap to Auto.
- Slightly increase the font size.
- Choose the widest master if you have many.
- Choose Text > Wrap > Apply.
When you apply the wrap, FontLab inserts manual line breaks at the end of each line and switches wrap to Manual. Once you’ve done that, reduce the font size a bit, and freely switch masters or change variation — the text no longer reflows!
To apply wrap, you can also Altclick the Auto wrap button in the property bar of the Glyph window Text mode when the button is on.
Components and anchors»
Anchors & Pins panel»
New You can now drag anchors in the Anchors & Pins panel to change their order. The first anchor is at the top of the list. To select multiple anchors in the panel, click them with Shift or with Cmd Ctrl.
New In the Position fields in the panel, you can now perform simple calculations (e.g. enter 50*3 or 230+50).
Anchor expressions»
New To force an anchor’s horizontal position to 0 (the origin point or the LSB line), you can now enter origin in the anchor’s x expression field. Previously,
you had to use width-width. Whenever you change the LSB of the glyph, that anchor will move to the new origin point.
To force the anchor’s vertical position to 0, enter baseline in the y expression field. To force the horizontal position to the RSB line, enter width in the x expression field.
Quicker selection of anchors»
When you have Preferences > General > Activate panels on object selection, and the Anchors panel is open, but is tabbed with another panel and is in the background, you can click an anchor and the panel comes to the foreground. New Now, the same click also selects the anchor. Previously, you needed to click the anchor again.
Manual composite layers»
To re-use existing shapes in your font, you can build a manual composite layer by adding components into a layer. This can be a full composite layer if it only contains components, or a partial composite layer if it mixes components with other types of elements, including simple contours. You can position any component directly by settings its x, y coordinates, or you can use corresponding anchors to position the component in relation to another component. A base anchor with any name corresponds to a mark anchor with the same name prefixed by _.
For example, if the a base glyph has an anchor named top, and acutecomb mark glyph has an anchor named _top, then these anchors correspond. When you build the aacute glyph those two components, the a component is placed at the origin (0,0), and the acutecomb component is moved so that its _top anchor snaps to the position of the top anchor in the a glyph.
To create a manual composite layer, you can use Font > Generate Glyphs (and turn Create auto layers off), or you can use Glyph > Add Component. When Preferences > Operations > add components is on and create auto layers is off, FontLab will also try to create a manual composite layer if you’re creating a new glyph in the Font window or via Font > Add Glyphs. You can use the anchors to position the components in all these situations — but once the components have been added, you can change their position freely. Moving the anchors in the component sources no longer affects the position of components in composite glyphs.
Auto layers»
When you mark a layer an auto Layer, and optionally provide a custom recipe, FontLab adds components according to the recipe (built-in or custom), positions them and sets the glyph metrics.
You cannot manually edit the content of an auto layer. The recipe can specify explicit numeric positioning, but the simple recipe syntax (e.g. A+acutecomb) uses corresponding anchors in the way described earlier.
Whenever you edit the component source glyphs, or move the anchors within them, FontLab updates the auto layer.
Auto layers have a particular limitation: you cannot easily add further anchors into them so that FontLab could build the mark attachment feature. Also, writing the auto layer recipes is not always convenient
for designers who prefer to work visually.
Attached components»
New FontLab 7.2 adds a lightweight mechanism for building composite layers: attached components.
- If a component is attached, it automatically snaps to the location determined by the corresponding anchors.
- You cannot manually move an attached component but you can scale, rotate, slant or interpolate it. To move an attached component, move the anchors that determine its position.
You can also move and edit any detached anchors and other elements in the glyph layer. With attached components, you can use the benefits of anchor-based placement of components, while you’re flexible in editing the metrics, and you can mix contours with components. You can also use interpolated components. All this is currently not possible with auto layers.
To attach a component, select it in the Glyph window and turn on Element > Attached, or toggle the “paper clip” icon in the Glyph window property bar, or click in the Attached component column in the Elements panel.
Let’s say you have the aringacute (ǻ) glyph, which in the current layer contains three components, in this order: a, ring and acute.
When you attach a component, for examplea or acute, FontLab checks if the source glyph layer of the component (current layer of the acute glyph) contains one or more mark anchors prefixed with _, for example _top and _side.
If the component’s source layer does not contain mark anchors:
- If the component is the first component in the glyph (the one listed at the bottom of the Elements panel,
ain this example), FontLab places it at the origin (0,0). - If the component is not first, you cannot attach the component. The attachment toggles in the component property bar and in the Elements panel are grayed out. The Element > Attached menu item has no effect.
If the component’s source layer contains mark anchors (anchors prefixed with _):
- FontLab searches for a base anchor that corresponds to the first mark anchor in the source glyph layer of the component that immediately precedes the component you are attaching, so it looks for the
topanchor in the current layer of theringglyph. (To reorder anchors, drag them in Anchors & Pins panel). - If
ringhas notopanchor, FontLab checksringfor a base anchor that corresponds to the second mark anchor, so it looks forsideinringetc. - If the source glyph layer of the preceding component has no corresponding base anchor, FontLab checks the source layer of the component that precedes that preceding component: it looks for
topina, then it looks forsideinaetc. - If FontLab does not find a suitable anchor in any of the preceding components, or if the component is the 1st component, it searches for a corresponding base anchor in the current layer of the composite glyph — first
for
top, then forside. - If FontLab finds a corresponding anchor, it moves the attached component so that its mark anchor snaps to the corresponding base anchor.
- If FontLab does not find any corresponding anchor, you cannot attach the component. The attachment toggles in the component property bar and in the Elements panel are grayed out. The Element > Attached menu item has no effect.
When you open a .glyphs file, FontLab attaches all components that are automatically aligned in the .glyphs file. When you export to the .glyphs format, FontLab exports all
attached components as automatically aligned .glyphs components.
Variable components»
In FontLab, a component typically points to a different glyph in the same layer, but it can also point to a glyph in a different layer, or to a dynamically interpolated instance. When you open the Elements panel, turn on Show/hide element properties at the top, and click Expand properties (^), the panel shows the Base layer name field.
In this field, you can enter a different layer name, or you can click the Select component instance to open a widget with variation sliders. When you drag the sliders, the base layer name changes to the #ax=val,ax=val axes notation (for example #op=12,wd=150,wt=375), and the component points to a dynamic instance at that location. Click Reset to current layer to point the component to the current layer.
Note
When you edit a source glyph of a variable component, you must choose Font > Update Glyphs (CmdAltM CtrlAltM) to see the change reflected in the variable component.
Other font formats either don’t support variable components that point to other layers or to instances, or support them in an idiosyncratic manner.
-
New When you decompose an variable component that points to an instance, FontLab now produces the correct contours. Previously, decomposing interpolated components replaced them with the contours of the current layer.
-
New When you export a font that uses variable components to UFO or DesignSpace+UFO, FontLab decomposes these components.
-
New When you export a font that uses variable components to OpenType TT, FontLab decomposes the affected glyphs.
Warning
When you export variable components to
.glyphs, FontLab replaces them with components that point to the current layer. This is a known limitation.
Glyph window»
Outline color in glyph window»
Editing modes of the Glyph window show the outline of contour-based elements in different colors:
- ■ black: simple contour
- ■ light gray: filtered contour (e.g. result of Smart Corner)
- ■ dolphin: New detached component
- ■ dark blue: current element
- ■ purple: New attached component
- ■ pale dark pink: element group
- ■ danube: selected non-current element
- ■ polo blue: Power Brush element
- ■ jungle green: glued contour
Preview panel»
When you type @ in the Preview panel canvas, FontLab 7.2 now instantly replaces @ with the current glyph. (To actually preview “@”, type @@). Previously, this worked in
a slightly confusing way.
Glyph metrics»
New When you turn on View > Metrics Table (in any Glyph window mode) and click it, you can now consistently use:
| Mac | Win | Mac and Win | |
|---|---|---|---|
| Previous glyph in text | Fn← | Home | Shift⇥ |
| Next glyph in text | Fn→ | End | ⇥ |
| Go one cell up | Fn↑ | PgUp | |
| Go one cell down | Fn↓ | PgDn |
When Preferences > Spacing > PgUp/PgDn navigate in Metrics Table, Up/down keys change value, is:
- on, the ↑↓ keys change the numeric value in the cell
- off, the ↑↓ keys go one cell up/down
Variations»
Faster interpolation»
New In FontLab 7.2, interpolation is 30× faster!
If you use the Variations panel map and sliders in a font with 2-3 masters, it’s completely instant, even if the Glyph window in Text mode or the Preview panel show many glyphs.
If you use the Play buttons that animate the variation preview along one or more axes, the animation also runs fluid, and typically consumes 30% of the CPU rather than 100%. Even when the Glyph window shows the entire character set of a font like Science Gothic with 4 axes and 36 masters or Graduate with 12 axes and 25 masters, when you click Play on an axis, the text animates at 3-4 “frames” per second. In older FontLab 7, it would change at 1 frame every 10 seconds, and you’d mostly see a “busy” cursor.
Thanks to the interpolation speed-up, FontLab also exports instances and variable fonts faster.
Variations panel»
The sliders in the Variations panel now show the location of New masters (as short lines). Previously, the sliders only showed axis instances (as larger dots).
In the List view of the panel:
- When you click any of the Play buttons, FontLab animates the variations preview along the axis. New In FontLab 7.2, the animation goes back-and-forth (ping-pong style). Previously, it arrived at the end of the axis scale and restarted at the beginning, which resulted in unpleasant jumps.
- When you Alt-click or Cmd-click any of the Play buttons, FontLab animates the variations preview along all axes. New When you do that, FontLab now correctly toggles the play/stop state of all Play buttons. Previously, it only visually toggled the button you Cmd-clicked.
Viewing the dynamic instance»
If Preferences > Variations > Show #instance layer is on, the Layers & Masters panel shows an #instance layer in all variable glyphs. The #instance layer is
a special read-only layer that contains the contours of the dynamic instance selected in the Variations panel. New In FontLab 7.2, you can view the content of the
currently selected dynamic instance in the Font window and in all modes of the Glyph window.
To switch the current font master, click it in the Layers & Masters panel, or Alt-click the master switcher in the property bar and choose it. You can
use the same methods to switch to the #instance layer. When a window is active, you can also switch between masters with Alt, (previous master) and Alt. (next master). Use Alt1 through
Alt9 to directly activate one of the first nine masters. New You can now activate the #instance layer
with Alt0.
New When you switch to the #instance layer, and you choose an instance, all Font window cells for glyphs that are variable now show the content of the selected instance.
Turn on the Wireframe status of the #instance layer to see its wireframe. Click the color circle next to the #instance layer to change the color of the wireframe. Turn off Wireframe to see the instance filled.
New In the Glyph window:
When you make one of the masters current, and you use the Variations panel to choose a dynamic instance, if the #instance layer is set to Visible in the Layers & Masters panel (the eye icon is open), you will then see a wireframe of that instance in the Glyph window editing modes, “behind” your masters.
When you make the #instance layer current and use the Variations panel to choose a dynamic instance, then you can see the detailed view of that instance in the Glyph window. In various
modes of the window (Contour, Metrics, Kerning), you will see the interpolated nodes, handles, anchors, sidebearings, kerning values, mark attachment, hints, guides, coordinates
and other details of the dynamic instance. You can even turn on FontAudit and see interactive problem reports that “appear” and “disappear” during variation. In the #instance layer, FontLab shows components as elements, so you can view their nodes and handles.
Use the View menu to turn the details on/off. Use the Play buttons to animate the variations along the axes, and watch the Glyph or Font window update.
The #instance layer is read-only. You cannot edit its content in the Glyph window. Switch to a master to edit.
When you have selected an instance and you wish to make corrections, click the + button in the top-right of the Variations panel (Add glyph master) and click OK. FontLab will create an intermediate master that you can edit. Keep in mind that if you have multiple axes, the intermediate master affects interpolation all the way through the “edges”. To counter-act this effect, create create additional intermediate masters at the edges of the design space at the same axis locations as the glyph master that has your corrections.
Using the layer preview color»
When you switch to the #instance layer and use the Variations panel to choose a dynamic instance or a predefined instance (in the Font instances tab of the List view of
the panel), the #instance layer will contain read-only contours of that instance. When you switch to a master, and then to the #instance layer, its content is the same as of the previously-active
master. You can use the layer preview color to easily distinguish that you’re looking at.
In the last column of the Layers & Masters panel, you can click the color circle next to any layer to assign its preview color. Alt-click the preview
color heading icons to assign unique colors to all layers. By default, the preview color of the #instance layer is bright red.

FontLab uses the preview color of a layer like this:
- When a particular layer is current, and Preferences > Variations > Preview master color is on, FontLab shows a bar of the assigned preview color at the top of the Glyph window (if Bar is chosen) or colorizes the background of the Glyph window (if Background is chosen). This is extremely useful when you switch between masters and the
#instancelayer in the Glyph window. - When the
#instancelayer is set to visible, and another layer is current, and you choose an instance in Variations, the#instancelayer wireframe is shown in the assigned preview color. - When the
#instancelayer is current and it is set to Wireframe in the Layers & Masters panel, then its wireframe is shown in the assigned preview color in the Font window cells, in the Preview panel and in the Metrics and Kerning modes of the Glyph window. - When Preferences > Variations > Show inactive layers as wireframes is on or some layers are set to Wireframe, and multiple layers are set to visible, then the wireframes of the non-current layers are shown in the preview colors assigned to those layers.
Axis user range»
New In Font Info > Axes, the user range is now shown in red if:
- if the user range is outside the recommended user range for registered axes: for example, the minimum user range for
wdthandwghtshould be at least 1 - the user range starts from 0 while the design range does not; this is not necessarily an error
Note
FontLab writes the DesignSpace and
fvaraxis range using the minimum and maximum location of masters, not the user range defined in the Axis Graph.
Actions»
Close Actions dialog with Esc»
New When you open Tools > Actions (ShiftCmdT ShiftCtrlT), you can now press the Esc key to close the Actions dialog without performing any actions.
Slant action»

New in the Actions dialog, the Basics > Slant action now allows you to also slant the layer content vertically. Previously, the action could only slant horizontally.
Perspective action»
New In the Actions dialog, the Effects > Perspective action now has a Reset button that sets the 3D rotation handle to default.
Hints»
Autohint»
When you have a trapezoid contour and use Tools > Autohint, the autohinter now produces more suitable hints.
StdW vs. StemSnap PostScript stems»
OpenType PS (.otf) and Type 1 fonts define have two kinds of stems for each direction: one standard stem (horizontal StdHW and vertical StdVW) and a list of common stems (horizontal StemSnapH and vertical StemSnapV). The standard stem is often, but not always, included in the common stems list. New FontLab 7.2 makes the handling of these
stems in Type 1, OpenType PS (.otf) and UFO more consistent.

When you open a Type 1 or an OpenType PS (.otf) font, FontLab names the stems:
HstemandVstemif theStdHW/StdVWstem values are also found in theStemSnapliststd.Hstemandstd.Vstemif theStdHW/StdVWare not found in theStemSnaplist, or if theStemSnaplist does not exist
New FontLab 7.2 now names the stem Hstem or Vstem if the stem is in StdHW/StdVW and in a single-entry StemSnapH/StemSnapV.
Previously, FontLab incorrectly named such a stem std.Hstem/std.Vstem.
When you export fonts to Type 1 or OpenType PS:
- New If a stem in Font Info > Stems is named
std.Hstemorstd.Vstem, FontLab 7.2 now correctly exports it asStdHW/StdVWstems, but will not include it in theStemSnapH/StemSnapVlist. If such a stem is the only stem in a given direction, FontLab does not writeStemSnapH/StemSnapVat all. Don’t use thestd.prefix unless you really want that behavior. Previously, FontLab did not export thestd.Hstem/std.Vstemstems at all. - If a stem is named
HstemorVstem, FontLab exports it asStdHW/StdVW. New FontLab now includes it inStemSnapH/StemSnapVeven if this stem is the only one stem in the given direction - If a stem has a different name, FontLab includes it in
StemSnapH/StemSnapV. If there is no stem with the names mentioned above, FontLab also puts the first stem in a given direction intoStdHW/StdVW. - New If there is only one stem in a given direction, and the stem name does not have the
std.prefix, FontLab includes it inStdHW/StdVWandStemSnapH/StemSnapV.
New When you open an UFO, FontLab 7.2 now reads the standard stems from the postscriptStemSnapH and postscriptStemSnapV entries of fontinfo.plist. It gives the
names Hstem and Vstem to the first entries. Previously, FontLab incorrectly named them std.Hstem and std.Vstem.
TrueType Hinting»
New FontLab now exports TTH commands into UFO in a new format com.fontlab.ttcommands, and correctly reads back the newer format and the older com.fontlab.ttprogram format.
See below for details.
PostScript hints»
FontLab now exports PostScript hints into UFO in a new, UFO3-compliant, format public.postscript.hints.
FontLab treats PostScript hints with the fractional portion .5 like integer values, and does not rounded them. In Adobe fonts that use integer coordinates, a hint that goes through the middle of a slightly
tilted horizontal or vertical line segment is used to align that segment. If the height/width of the tilt has an odd value, the hint in the middle has a “half” value.
When you create a composite glyphs using Font > Generate Glyphs or double-click an empty Font window cell, FontLab no longer copies PS hints from the component source glyphs. Composite glyphs do not need hints at this point. FontLab will copy the hints when you decompose the composite glyph or when you export the font as OpenType PS.
Features»
The OpenType Layout process»
In OpenType fonts, features are defined in two OpenType Layout tables: GSUB, which performs the glyph substitution, and GPOS, which performs glyph positioning.
The features are just labels that identify actions that the font performs. The actual actions are defined in lookups. Each lookup is a group of rules. Each
rule describes what happens to a particular glyph, series of glyphs, or glyph class(es).
When an app lays out a line of Unicode characters, it first performs run itemization: it segments (splits) the text into runs that have the same font, size, direction, as well as the same script (writing system) and language system (language and orthographic convention). For each run separately, the app calls the OpenType shaping engine — a software library (such as HarfBuzz that is responsible for turning a series of Unicode codepoints into a series of positioned glyphs.
The shaping engine reads the used font and requests the default glyph for each Unicode character. Then the engine uses built-in rules, specific to each script, to decide which features it needs to apply. It applies a list of features specific to each script, and also applies additional user-selectable features.
All this happens in several stages (steps). The table below shows a simplified breakdown of the most common stages, though details differ between shaping engines.
| Name | Table | Features | Scripts |
|---|---|---|---|
| Pre-processing | GSUB |
rvrn, locl, ccmp, other |
all + complex |
| Reordering | GSUB |
various | complex |
| Topographical | GSUB |
isol, init, medi, fina |
complex |
| Typographic | GSUB |
calt, clig, liga, rclt, rlig, user-selectable |
all |
| Positioning | GPOS |
curs, dist, kern, mkmk, user-selectable, script-specific |
all + complex |
In every stage, the shaping engine reads the lookups that the font maps to the features that the engine wants to apply in that stage. The engine then goes through the list of the lookups, and executes them on the current run. It uses the glyph sequence that is the result of one lookup as the input for the next lookup. When the engine has executed all lookups in one stage, it proceeds to the next stage.
If a lookup is mapped to multiple features that the engine applies within one stage, the lookup is executed only once. But if a lookup is mapped to several features applied in different stages, the lookup may be executed several times.
Note
The OpenType Layout shaping process is described in several articles, by Microsoft Typography, by Nathan Willis, by Liang Hai and Peter Biľak.
Microsoft describes the shaping process for different scripts, and Nathan Willis classifies features used there.
Richard Ishida and ScriptSource offer more information.
Feature-centric vs. lookup-centric approach»
The binary OpenType Layout tables (GSUB/GPOS) are structured in the following way:
- The list of script records defines the writing systems for which features are defined in the font.
- Each script has the default language system and optionally additional language systems.
- A lookup describes a series of substitution operations (in the
GSUBtable) or a series of positioning operations (in theGPOStable) that happen in the font. - All lookups are gathered in the list of lookups, which defines the order in which lookups are applied in a given shaping stage.
- Each lookup has a specific format, may contain subtables and other structures that describe the inner workings (the implementation) of the lookup.
- Lookups are mapped to feature records, and those are assigned to the language systems. A feature with a certain 4-letter tag (for example
liga) may have multiple feature records, each may have different lookups mapped, and then each of those feature records is assigned to a different language system, possibly within different scripts.
In the Features panel, you can use the FEA syntax to define OpenType features. This is the same syntax that the standalone Adobe FDK for OpenType (AFDKO) uses. The FEA syntax is also used by other popular font editors.
In the FEA syntax, the distinction between lookups and features is a bit blurred. Feature definitions are wrapped in feature blocks. A feature block may reference a previously-defined named lookup, or may explicitly
define and reference a named lookup, or may implicitly define and reference an unnamed lookup. Sometimes, this is very helpful. In fonts for European scripts:
- You typically define many user-selectable features.
- Each feature often only uses one lookup.
- Each European script that the font supports (Latin, Cyrillic, Greek) often uses the same set of features and lookups.
- Only the
loclfeature defines “exceptions” for specific languages.
So a common piece of feature definition code in the FEA syntax might be:
languagesystem DFLT dflt;
languagesystem latn dflt;
languagesystem latn TRK;

feature locl {
  script latn;
  language TRK;
  sub i by i.TRK;
} locl;

feature liga {
  sub f i by f_i;
}
This FEA code defines two scripts for the font: default, with only the default language system, and Latin, with two language systems. Then it defines two features. It also implicitly defines two lookups. It maps one lookup
to the locl feature, and assigns that feature definition to the Latin script, Turkish language system. It then maps the other lookup to the liga feature and assigns that feature definition
to all defined scripts/language systems.
When you export the font and use it in an app, and you’ll get the “fi” ligature except if the language of the text is specified as Turkish.
The order of feature definitions in the code should not matter, because shaping engines are supposed to apply all lookups mapped to the locl feature in the pre-processing stage, and are supposed to apply all
lookups mapped to the liga feature later, in the typographic stage.
But not all shaping engines work that way, so it’s best to make sure that the lookups for the locl feature are defined before the lookups for the liga feature. Because the above code defines
lookups implicitly, inside the feature definitions, the order of the feature definitions matters.
Consider this FEA code:
# global script and language definition
languagesystem DFLT dflt;
languagesystem latn dflt;

# standalone explicitly defined named lookup
lookup salt {
    sub A by B;
} salt;

feature ss01 {
  # optional script and language keywords
  script latn;
    language TRK;
  # explicitly defined named lookup
  lookup ss01 {
    # rules inside lookup definition
    sub B by A;
  } ss01;
  # optional reference to previously-defined lookup
  lookup salt;
  # rules inside implicitly defined lookup
  sub A by C;
} ss01;

feature salt {
  lookup salt;
}
When you compile this feature definition, FontLab builds the OpenType Layout GSUB table that has three lookups, defined in the following order:
lookup salt {   sub A by B; } salt;
lookup ss01_1 { sub B by A; } ss01_1;
lookup ss01_2 { sub C by D; } ss01_2;
Each of these lookups is of GSUB LookupType 1 (single substitution), and each contains one subsitutution rule.
All three lookups are mapped to the ss01 feature, which is assigned only to to script latn and language TRK. The first lookup is also mapped to the salt feature, which
is assigned to the default language system of the DFLT script, and to the default language system of the latn script, but not to the TRK language system of the latn script.
So when you export the font and use it in an app, and you specify the language of the text as Turkish, only the ss01 feature will be available. If another language of the text is specified, only the salt feature will be available.
When you apply the ss01 feature in the text tagged as Turkish-language, the letter C will be replaced by D. A will be replaced by B and then that B will again be replaced by A, so in the end, all As will remain unchanged.
This may be a bit surprising, but that’s how OpenType works. Shaping engines are supposed to apply all lookups mapped to the user-selectable features (which both ss01 and salt are) in the
typographic stage. So the order of the lookups matters. But note that in this code example, the salt lookup is defined explicitly before any feature block. So that lookup will be defined first
in the compiled tables. Then the ss01 lookup is defined, inside ss01, so that lookup is second. The ss01 feature definition then references the salt lookup, but that
lookup had already been defined, so it’s still first. Finally, the third lookup is defined implicitly.
Perhaps you’ve once heard that the order of feature definitions matters. But we have just seen that in reality, it always is the order of the lookups that matters, at least for the features that a shaping engine applies in the same stage. The FEA syntax lets us implicitly define and instantly map lookups inside feature definitions — but that’s just a shorthand.
Features panel»
To enter a glyph name in the Features panel, type it. Alternatively, place your text cursor in the appropriate location, tap the / key, type a new glyph name, or a portion, or a synonym, choose the glyph from the visual list and press Enter. New When your text cursor is inside a glyph name and you use insert the glyph name via the / method, FontLab 7.2 now replaces the previous glyph name. If the cursor is inside a class name, FontLab inserts the glyph name after the class name. Otherwise, it inserts it at the cursor location.

New Place the text cursor in a glyph name, hold Alt and hold the mouse button: FontLab will show a small preview of the glyph.
New Hold Cmd Ctrl and click a glyph name: FontLab makes the glyph current in the Font or Glyph window, replacing the current glyph. Hold CmdAlt CtrlAlt and click a glyph name: FontLab adds the glyph to the Glyph window text after the current glyph.
New Place the text cursor in a class name (that starts with @), hold Alt and hold the mouse button: FontLab will
show a list preview of the class. While you are holding the mouse button, you can scroll the list.
New Hold Cmd Ctrl and click a class name: FontLab opens the Classes panel and goes to that class (if the class is defined in the Classes panel).
New Search in the Features panel in now case-sensitive.
New When you choose ☰ > Remove All Features in the Features panel, FontLab also removes the stored compiled features, so the change is immediately visible in the Glyph window and in the Preview panel.
When you select the Features section of the Features panel, you can see the code for all features, but you cannot edit it. New Previously, you could edit the code there but the edits were rejected. Now FontLab does not let you make any edits there.
To edit the code for a feature, choose the feature in the list on the left. To edit the particular feature, select it in the list at the left.
Lookups panel»
Previous versions of FontLab 7 stored data related to OpenType Layout features in several forms:
- Visual kerning and anchors, defined in the Glyph window and associated panels. FontLab can build the
kernfeature from visual kerning, and themark/mkmkfeatures from anchors, and can convert these feature definitions into visual kerning and anchors. - Source feature definitions, described in the Features panel using the FEA syntax.
- Compiled binary OpenType Layout tables, which is used when you test features directly on the Glyph window or Preview panel text, and when you export the font into the OpenType format.
- Optionally, the Tables panel can include XML definitions of the
GSUBandGPOStables. You can use these definitions to export the binary tables — FontLab will then ignore the source feature definitions or the visual kerning and anchors.
New FontLab 7.2 adds a new Lookups panel, which offers in-depth visual proofing for your feature definitions. The Lookups panel shows the scripts, language systems, features and lookups that are defined in the font. The content of the Lookups panel content does not automatically reflect source (FEA syntax) feature definitions, or the compiled binary tables. Instead, it stores the feature definitions in an additional, separate data structure inside the VFJ/VFC.
This may sound like an over-complication, but there is good reasons to it: FontLab stores the Lookups panel content in a format that is compatible with the Microsoft VOLT app, which is popular among developers of fonts for “complex” scripts. The visual structure of the panel is also familiar to VOLT users.
In FontLab 7.2, you can use the Lookups panel for detailed visual proofing of your OpenType feature definitions. In future versions of FontLab, you will be also able to visually edit both substitution and positioning features in this panel, as an alternative to editing them in the text-based FEA syntax in the Features panel.

The Lookups panel consists of three areas. You can drag the dividers between the areas to change their proportions within the panel.
Features area»
The left Features area lists entries (scripts, language systems and feature records) that are defined in the font.
The top bar of the Features area includes:
-
The Features filter box. Type a feature tag or name to only show entries associated with that feature.
-
The Import from Features panel button. If you click it and the Lookups panel has content, FontLab shows a dialog. If you choose Replace, FontLab removes the content of the Lookups panel, and converts the content of the Features panel into the Lookups representation. If you Shift-click the button, FontLab shows no dialog and instantly replaces the panel content with the content converted from the Features panel.
-
The Show substitutions and Show positioning toggles. Turn them on/off to only see entries for substitution features, or positioning features, of entries for both kinds.
The bottom bar of the Features area includes:
-
The Organize by scripts toggle. Click it to show the entries in the Features area sorted by script, then language system, then feature. If you turn on Show lookups, the entries will also show all lookups mapped to the feature.
-
The Organize by features toggle. Click it to show the entries in the Features area sorted by feature, then script, then language system, then lookup.
Lookups area»
The central Lookups area lists lookups that are mapped to the entries selected in the Features area.
If you multi-select the lookups in the Features area, or click a higher-level entry in the Features area, the Lookups area will show multiple lookups. If you click a lookup in the Features area, the Lookups area will only show that lookup.
Click a lookup in the Lookups area, and FontLab will show its content in the Rules area.
The top bar of the Lookups area includes:
-
The Lookups filter box. Type the beginning of a lookup name to only show matching lookups.
-
The Color flag selector. Use it to assign color flags to lookups, purely for better visual orientation.
New The bottom portion of the Lookups area includes the Glyph filter box. Type a glyph name to only see lookups that involve a particular glyph. You can also use the * wildcard (any characters) or ? (any single characters). For example, type *-cy to only see lookups that affect Cyrillic glyphs, or type *.sc to only see lookups that affect small
caps.
Rules area»
The right area shows the Rules — the content of the lookup that is selected in the Lookups area. The layout of the Rules area depends on the type of lookup selected in the Lookups area.
New The bottom portion of the Rules area includes the Glyph filter box. Type a glyph name to only see rules that involve a particular glyph. You can also use the * and ? wildcards For example, type *acute* to only see rules that affect glyphs that have the acute substring in the name.
For a substitution lookup, the Rules area shows a list of substitution rules. The Shapes column shows the preview of “before” and “after” glyphs, the Substitutions column shows the glyph names. The -> marker separates the input and output glyphs, similar to the by keyword in FEA syntax.
A black preview indicates an individual glyph. A blue preview (and a class name prefixed with @) indicates a class. Double-click the blue preview glyph or use ←/
→ to expand/collapse the class. When the class is expanded, the list will show each member of the class.
Click a substitution rule (or an entry in an expanded class), or use ↑/↓ to navigate in the list: the Preview panel will then show a large preview of the substitution rule. You can use the Variations panel to preview the substitution rule across the design space.
Open the Preview panel sidebar and click the Copy content to window button (arrow in the top-right) to put the content of the substitution rule into the Glyph window. Click the Echo text button in the Preview panel to preview the content of the Glyph window instead.
The Context section at the bottom of the list shows entries if the lookup is contextual. The Lookups panel follows the conventions used in Microsoft VOLT to display context.
For a positioning lookup, the Rules area shows one or two columns. Use ⇥/Shift⇥ or click to jump between the two columns.
Click a positioning rule or use ↑/↓ to navigate in the list, and the mini-preview area of the Lookups panel (not the Preview panel) will show a large preview of the positioning rule. The mini-preview area has a zoom dropdown above, and six numerical fields below: the x, y and width adjustment of the 1st and of the 2nd glyph. The fields only show a value if the rule changes it, otherwise a field is empty.
Use the UI elements at the bottom to preview the glyphs with a different fill color, stroke and transparency. This is helpful when you’re previewing overlapping glyph positioning.
Double-click any substitution or positioning rule, and the Font or Glyph window will show the first input glyph of the rule.
Proofing OpenType features»
FontLab 7.2 has two ways to proof/text OpenType features: testing features in text, and the new visual proofing in the Lookups panel.

Testing features in text»
When you type some text into the Glyph window or Preview panel and turn on Features processing (in the property bar or side bar of the window, or with the fi icon in the Preview panel sidebar), FontLab compiles the features defined in the Features panel, and uses the built-in HarfBuzz shaping engine (same as is used in Android, Chrome, Firefox or LibreOffice) to perform run itemization (same as any of these apps would do), and then applies features to the text.
You can use the checkboxes to turn features on/off, and at the bottom of the Features selector, you can explicitly declare the script and language system to be used.
This method of testing is great if you know what you should test for, so you have sample texts that, for example, include letter combinations that will turn into ligatures, or letters followed by combining marks that will be positioned over them.
Visual proofing in the Lookups panel»
New FontLab 7.2 also lets you test your OpenType features in a different way: in the new Lookups panel, you can explore all situations that your feature definitions describe.
If you open the Features panel and choose ☰ > Add Auto Features, FontLab analyzes the glyph names in your font and automatically
builds various OpenType features that the glyph repertoire of your font supports. You can also add a specific feature with the + button at the bottom of the panel. If the feature in the list has a bullet,
FontLab will auto-generate the feature definition. And if you have existing feature definitions, you can click the star button at the top of the Features panel to auto-generate its contents. You can mix
auto code with manual code — just write your manual code after the special #< feature line.
If you build a feature this way, for example smcp, can read the resulting FEA code in the Features panel to check if the results are what you want — but this is not very comfortable.
New Now, in the Lookups panel, you can actually see all substitutions that the lookups that are mapped to the feature will perform, all the “before” and “after”
glyphs.
If you have created feature definitions in the Features panel and the Lookups panel is empty, click the Import from Features panel button in the top-left of the Lookups panel. FontLab then compiles the FEA code, and if the code is valid, converts the feature definitions to a visual structure that you can explore in the Lookups panel.
If you have modified the feature definitions in the Features panel, Shift-click the Import from Features panel button, and the Lookups panel content will update.
When you export the font into OpenType or other formats, FontLab always uses the FEA code from the Features panel to compile the final features. The Lookups panel is only for visual proofing. However, if you export feature definitions into a VOLT project file, FontLab will use the content of the Lookups panel.
Testing kerning»
Testing kerning is different than testing other features. Normally, FontLab stores kerning as “visual kerning”, in its own special data structure. You can use the Classes panel to define kerning classes per master, and you can use the Kerning mode of the Glyph window, or the Kerning panel to create and edit class-to-class, class-to-glyph, glyph-to-class and glyph-to-glyph kerning pairs. FontLab 7.2 currently only supports horizontal left-to-right visual kerning.
The 3rd top-left toggle in the Glyph window property bar (Show kerning) controls whether or not FontLab applies the visual kerning to the window text. In Kerning mode, visual kerning is always applied. In other modes, you can use the toggle to show or hide the effects of visual kerning.
When you switch the master in a multi-master font, the Glyph window shows the visual kerning defined in that master. When you use the Variations panel, FontLab displays interpolated kerning in the Text mode of the Glyph window, and in the Preview panel.
When you export your font to OpenType, FontLab needs to convert the visual kerning into a kern feature. This typically happens on export, and you can fine-tune the process in the export profile.
But you can also use the Features panel ☰ menu to create the kern feature code based on the current master’s visual kerning,
and Compile. Then, in the Features selector of the Glyph window, you can turn the kern feature on/off. If you apply the kern feature, the Glyph window turns off the
Show kerning toggle, because it can display either the results of the visual kerning, or of the compiled kern feature, but not both.
New If you have created the kern feature code, or your import feature definitions that contain a kern feature, you can now proof it in the Lookups panel, just
like any other feature.
Since kern is a positioning feature, the Lookups panel mini-preview area shows the the x, y and width adjustment fields of the 1st and of the 2nd glyph. Typical kerning
only changes the advance width of the 1st glyph in the pair, so the other fields are empty. For class members, you may see combinations that are not kerned — this is normal, that’s how OpenType class
kerning works.
Note
If you have multiple masters and your FEA code has the
kernfeature explicitly defined, make sure to set the export profile to Always create [kern] code, so that FontLab re-builds thekernfeature definition for each master and instance separately on export. Otherwise, the same kerning will be exported into all masters and instances. You may also remove thekernfeature from the Features panel after you’ve done proofing. Switch to another master and create thekernfeature to proof the OpenType kerning for that master.
Testing mark attachment»
Testing mark attachment is also different than testing other features.
FontLab uses corresponding base and mark anchors to dynamically preview mark attachment. If View > Show > Anchor Cloud is on, and a base glyph is current in the Glyph window, FontLab previews the attachment of all marks that have corresponding mark anchors.
If the 4th top-left toggle in the Glyph window property bar (Show mark attachment) is on, and your text contains a sequence of base and mark glyphs, FontLab will position the marks over the base glyphs. If you turn the toggle off, FontLab will render the marks on the baseline.
When you export your font to OpenType, FontLab needs to convert the corresponding anchor pairs into the mark feature that positions marks over base glyphs, and into the mkmk feature that positions
additional marks over marks. This conversion can happen on export, and you can fine-tune the process in the export profile.
If you use the Features panel ☰ menu to create the mark and mkmk features for the current master, FontLab uses the
corresponding anchors to generate the mark attachment code. When you compile your features, in the Features selector of the Glyph window, you can turn the mark and mkmk features
on/off. If you apply these features, the Glyph window turns off the Show mark attachment toggle, because it can display either the results of the anchor-based mark attachment, or of the compiled mark/mkmk features, but not both.
New The FEA code for mark/mkmk is not very readable, but you can now use the Lookups panel to exactly see which marks will attach to which glyphs, and what the
result will be. The process is identical to the just-described proofing of the kern feature in the Lookups panel.
Note
If you have multiple masters and your FEA code has the
mark/mkmkfeatures explicitly defined, make sure to set the export profile to Always create [mark/mkmk] code, so that FontLab re-builds the feature definitions for each master and instance separately on export. Otherwise, the same mark positioning will be exported into all masters and instances. You may also remove themarkandmkmkfeatures from the Features panel after you’ve done proofing. Switch to another master and create the features to proof the OpenType mark attachment for that master.
Interchange with Microsoft VOLT»
Microsoft VOLT is a free app for Windows (does not work on macOS). VOLT is a visual editor that you can use to add feature definitions into OpenType fonts. You can use it to visually position anchors, create anchor-based mark and cursive attachment features, proof lookups and set various flags to control precise aspects of OpenType features. VOLT is most useful for non-Latin fonts, especially for “complex” scripts such as Arabic or Indic.
To get VOLT, go to the VOLT website and download the app for Windows. You must install it on Windows. It does not work on Wine/CrossOver, but does work in virtual machines such as Parallels Desktop or VMWare Fusion.

Exporting features as a VOLT project file is beta functionality. We don’t guarantee that it fully works, but our initial tests show that the results are quite good. At this point, you can use FontLab to open any font that has features in FEA syntax or has binary features, and you can export these features to VOLT. You can also decompile binary features into FEA syntax in FontLab. FontLab 7.2 can also import features directly from VOLT project (VTP) files using File > Import > Features.
FontLab 7.2 provides comprehensive integration with Microsoft VOLT, so you can use both apps together to create OpenType fonts for any writing system of the world:
- Open an existing OpenType font to decompile the binary
GSUB/GPOStables into the FEA syntax in the Features panel and into VOLT-compatible representation in the Lookups panel. Fine-tune the decompilation in Preferences > Open Fonts > OT features. - Use ☰ > Add Auto Features in Features panel to auto-generate many feature definitions based on glyph names.
- Import feature definitions created in Microsoft VOLT. Open a VOLT-saved OpenType font that includes the
TSI*tables, or choose File > Import > Features and choose VOLT project file (*.vtp). - Convert feature definitions from FEA syntax (also auto-generated or decompiled) into VOLT syntax.
- Convert feature definitions from VOLT syntax into the FEA syntax.
- Choose File > Import > Features and choose VOLT project file (*.vtp) to export feature definitions and then import them into VOLT for editing.
- Export OpenType fonts that include features that were created in Microsoft VOLT.
- Visually proof (but not yet edit) features in the Lookups panel.
Warning
Importing feature definitions created in VOLT, exporting feature definitions as VOLT project files, converting them into FEA syntax, and compiling features converted from VOLT data is beta functionality. We don’t guarantee that it fully works. Known limitations include problems in exporting certain contextual lookups into VOLT.
VOLT currently has no support for variable or multiple-master workflows. However, you can export each master separately, one by one. Then, work in VOLT, and finally build your variable font using
fontmake.
Exporting feature definitions to VOLT»
Before you export your feature definitions as a VOLT project file (*.vtp):
-
Sort your Font window by Index and make sure your first 4 glyphs in the font are
.notdef,NULL,CRandspace. This is because you’ll need to export the font as OpenType, and FontLab will put these glyphs first in the font. -
Switch to the master you want to export.
-
You may want to Add Auto Features in the Features panel ☰ menu.
-
If you want
GPOSfeatures, then in the same menu, choose Create [kern] and Create [mark] and [mkmk] to create the FEA code for your kerning and mark attachment for the current master. When you export the features into the VOLT project file, FontLab will include these feature definitions, and you’ll be able to visually refine kerning and mark positioning in VOLT. -
If your Lookups panel is not empty (i.e. it contains an older lookups data), Shift-click the Import from Features panel button at the top of the Features pane of the Lookups panel.
To export your features as VOLT project file (*.vtp):
-
Go to File > Export > Export Font As…, choose the OpenType TT (.ttf) or OpenType PS (.otf) profile, click Customize…. In Glyph organization, turn off Sort glyphs in optimal order and choose Use current glyph names. Export Current layer using that profile.
-
Go to File > Export > Features… and choose the VOLT project file (.vtp) format.
-
Navigate to the same folder as you’ve exported the font, and export the
.vtpfile.
In Microsoft VOLT, group names (class names) are case-insensitive. When you export feature definitions to a VOLT project file, FontLab 7.2 uses the UFO user name to file name convention to convert the FontLab or FEA class names into VOLT group names. Most importantly, it adds an _ after each uppercase letter in the name.
New Microsoft VOLT does not accept glyph or anchor names that contain a hyphen (-). When you export features as a VOLT project file, FontLab replaces the - in glyph and anchor
names with three periods (...). When you import features from a VOLT project file, FontLab replaces ... with - in glyph and anchor names.
Using Microsoft VOLT»
When you have an OpenType font (.otf or .ttf), and a VOLT project file (.vtp), open the OpenType font in VOLT, and then use Import > Import Project > Import Everything to import the VOLT project file.
In VOLT, once you’re done editing the features, choose Tools > Compile to compile the feature definitions, then choose File > Ship Font to export the binary tables (GSUB,
GPOS, GDEF) into the font.
Sample VOLT fonts»
Tiro Typeworks has published the FontLab-compatible VFB font sources and VOLT project files for the Slabo fonts, and FontLab 7 VFJ font sources with VOLT project files for the Castoro fonts.
FontLab can decompile binary features from OTF/TTF fonts, and now it can export features into VOLT. Therefore, you can open an OpenType PS or TT font in FontLab, export the features into VTP, then open the font in VOLT, import the exported VTP — and you have editable features in VOLT, for any writing system!
For example, you can download any of the Toto fonts, which are fonts from the Noto project but licensed under the Apache 2 license, and re-use some of the features from these fonts.
Note
The Apache 2 license lets you re-use portions of the Toto fonts in your own fonts, this includes the features: you must follow the license, and include the copyright notice and the text of the license in your derivative font. However, you may publish the font under your own license. See the Apache 2 FAQ for details.
More VOLT resources»
-
Read the VOLT tutorial by MS and the user guide
-
Read the VOLT tutorial by SIL
-
Check the VOLT article by Karel Píška
-
Download the VOLT tutorial video from Microsoft. Unzip, open the
VoltTrainingVideo_WMV_mediasubfolder, and watch the video in an app such as VLC or other video player that supports theWMVformat. -
Al Mamun Hossen has created a series of Bangla-language videos that show how to use FontLab to create a Bangla font, and another series on how to use VOLT to add features to that font. These videos are easy to follow even if you don’t speak Bangla.
-
Tiro Typeworks has published Volto, a Python script that can convert the VTP file into a FEA file that you can import into FontLab.
-
SIL International has published FontUtils (source), a set of Perl utilities that include commandline
volt2ttfandttf2voltapps that can convert between VTP and binary tables in both directions.
Note
For more info about using Microsoft VOLT, visit the VOLT forum. VOLT is a Microsoft product. FontLab does not offer technical support or assistance regarding the app.
Kerning»
Import kerning from kern feature»
If you’ve modified the kern feature or imported a kern feature definition from a .fea or .vtp file, or you have copied them from another font, you can now choose
Font > Kerning > Import from [kern] Feature to convert that kerning into the current font master’s visual kerning. Then, you can edit the visual kerning in the Kerning mode of the
Glyph window or in the Kerning panel.
Glyph names»
Built-in glyph names»
New FontLab 7.2 has an updated version of its built-in standard.nam naming table that maps Unicodes to friendly, alternative, production and synonym glyph names. The table adds more than
1,200 synonyms for Cyrillic and Arabic glyphs (courtesy of ParaType). It also fixes some minor naming issues and updates the Alternative mapping scheme to the latest GlyphsInfo names.
Renaming glyphs»
When you select glyphs and choose Font > Rename Glyphs > Suffix…, FontLab opens the Glyph Name Suffix dialog. New FontLab now remembers whether the Replace existing suffix checkbox was on or off when you last opened the dialog.
New FontLab now shows an auto-complete dropdown that lists glyph names found in the naming table (including synonyms) when you type at least 3 characters in the Glyph name field in the Glyph panel or the Glyph > Rename Glyph (Cmd\ Ctrl\) dialog.
When you rename a glyph, you can enter a Unicode character, such as ą, also a digit like 2, and FontLab automatically changes that name to the appropriate glyph name, e.g. aogonek or two. This way, you don’t need to remember the sometimes cryptic glyph names. This also works in ligatures: when you assign the name T_ą, FontLab will rename the glyph to T_aogonek.
New In FontLab 7.2, you can now change the glyph name to one that has a digit immediately following the underscore sign, e.g. logo_2. FontLab no longer changes that name to logo_two.
Warning
Use Glyph > Rename Glyph to rename the glyph itself, and also to change the name in features, classes, kerning pairs and auto layer recipes. When you type a new glyph name in the Glyph panel or in the Font window glyph cell, FontLab only renames the glyph itself!
Missing glyph placeholders»
If Preferences > Editing > Show missing glyph placeholders is on, and you type some Unicode text into the Glyph window, and the font does not have glyphs for all the characters: FontLab shows placeholders for the glyphs that are not present in the font.
New FontLab 7.2 now uses the naming scheme chosen in Preferences > Operations > Use names when adding or renaming glyphs when you double-click one of the placeholders to create the glyph, and when you select the text (including the placeholders) in Text mode and choose Text > Copy Text > /Names. Previously, FontLab always the Friendly glyph naming scheme.
Virtual tags»
New FontLab now assigns the asc virtual tag to letters with ascenders, and the desc virtual tag to letters with descenders more smartly. It handles most Latin, Cyrillic and
Greek letters correctly.
You can view virtual tags in the Classes panel, and you can use them as FEA classes in your feature definitions if you turn on ☰ > Include Classes > Virtual Tags in the Features panel.
FontLab assigns those virtual tags to letters and letterlike symbols based on their Unicode properties, not the actual glyph shape. FontLab does not assign them to alternates, but you can copy the list of glyph names assigned to the virtual tag, paste them into a plain-text editor, add a suffix and then create a class with the suffixed glyphs.
Bidirectional text (Arabic and other right-to-left scripts)»
New FontLab 7.2 brings improved support for the Arabic script and other right-to-left (RTL) scripts such as Hebrew.
Bidirectional support in Glyph window and Preview panel»
To activate bidirectional (bidi) script processing in the Glyph window, open the sidebar or, in the Text mode, click the fi icon in the property bar. This opens the features selector. In the features selector, turn on Features. To activate it in the Preview panel, open its sidebar, click fi and turn on Features.
When bidi is active (Features is on in the features selector), FontLab applies the same Unicode preprocessing to the text in the Glyph window or Preview panel as an end-user text editor would. It segments the text into script-specific runs, and lays the text according to the layout order.
If the font has any feature definitions, compile them to test the shaping and features.
Right-to-left mark attachment»
New In FontLab 7.2, you can preview mark attachment for RTL scripts in the Glyph window. This was previously not possible:
- Turn on the Show mark attachment button in the top-left of the Glyph window property bar, and FontLab will preview anchor-based mark attachment. This uses the corresponding anchors, and works with variations.
- If you manually generate the
mark/mkmkfeatures in the Features panel for the current master, and compile the features, you can also turn on these features in the features selector. FontLab will turn off Show mark attachment and will preview mark attachment based on the feature code. This always uses the current masterGPOScode, and will work even with imported/decompiled features. This should correctly preview more complicated mark attachment scenarios, including contextual mark attachment.
Positional features»
New FontLab 7.2 now lists the positional features (init, medi and fina) in the Features panel + menu, so you can easily add them. FontLab
can also auto-generate the feature code for those features if your font uses one of the standard naming schemes for the glyphs. If you’re building these features for Arabic, you’ll need to make a small manual
correction to the auto-generated code.
If you add one of the three positional features in the Features panel and click the star in the panel’s top bar, FontLab will build the FEA code like so:
feature init {
# Initial Forms

#> feature
  sub uni0626 by uni0626.init;
  sub uni0628 by uni0628.init;
  # ... (omitted)
  sub uni076D by uni076D.init;
#< feature
} init;
For the Arabic script, you need to add a bit of code before the #> feature line. If your font supports additional languagesystems, also add simple code after #< feature line. Ultimately,
your code should look like this:
feature init {
# Initial Forms
script arab; # Register the features for the Arabic script only
lookup init_arab { # Create a named lookup
lookupflag IgnoreMarks RightToLeft; # Supply the lookup flags

#> feature
  sub uni0626 by uni0626.init;
  sub uni0628 by uni0628.init;
  # ... (omitted)
  sub uni076D by uni076D.init;
#< feature

} init_arab;
language URD ; # Add this if you have an Urdu-specific locl feature
language FAR ; # Add this if you have a Persian-specific locl feature
} init;
With the code above, FontLab will still be able to update the FEA code between the special lines.
To add isol, create an empty feature and name it accordingly. Currently, FontLab does not auto-generate isol.
Font names»
When you export instances or Font Info > Names > Build Names, FontLab automatically builds derived font names like the Full Font Name or the PostScript Name from the Typographic Family Name and Typographic Style Name. New FontLab 7.2 automatically shortens the style name portion of the Full and PostScript names if the length of the Full Font Name would exceed 32 characters. Previously, this happened if the length exceeded 27 characters.
Font window»

Unicode-name mismatch»
FontLab uses a mapping table that maps Unicode codepoints to friendly, alternative, production and synonym glyph names. By default, FontLab uses its built-in standard.nam mapping table but you can pick your
own .nam file in Preferences > Operations > Unicode-name mapping.
When there is a conflict (mismatch) between the glyph name and a Unicode codepoint assigned to the glyph, the Font window shows a name-Unicode mismatch indicator, which is a horizontal line underneath the glyph cell caption. Previously, the mismatch indicator was always red. New In FontLab 7.2:
-
the indicator is red if the mapping table lists the name but the glyph does not have the Unicode codepoint that the mapping table assigns to that name; for example, the glyph name is
a(which the mapping table assigns to U+0061) but the Unicode codepoint for the glyph is U+0041 (which the mapping table assigns toA) -
New the indicator is yellow if the mapping table does not assign the name to any of the glyph’s Unicode codepoints; for example, the glyph has the Unicode codepoint U+0041 but its name is
latinA
New You can now show or hide the indicators in Preferences > Font Window > Show in cell > Unicode-name mismatch.
Sort Font window by glyph name suffix»
New In the Font window top bar, you can now click the Sort dropdown and choose Suffix. The Font window will show glyphs without any name suffix first, then will alphabetically sort all unique suffixes and show groups of glyphs that have each suffix. Within each group, cells are sorted alphabetically by their name.
Note
If an Encoding filter is applied to the Font window, the filtered cells are shown in the Encoding order, the unfiltered glyphs are shown in the Sorting order. To change the actual glyph order in the font, choose Font > Sort Glyphs > Current Order.
Filter Font window by glyph name suffix»
New In the Font window sidebar, you can now double-click the new Suffix section to see all the suffix particles found in the glyph names in your font. A suffix particle is any portion of the glyph name between two periods (.) or after the first period. The glyph a.sc will show up in the Suffix section under .sc. The glyph b.sc.ss01 will show up under .sc and under .ss01. The glyph c will show up under None.
Click the suffix particle or None to filter the Font window by the chosen suffix particle. To only see the filtered glyphs, turn on the Hide unfiltered glyphs toggle in the top bar. When the toggle
is off, the filtered glyphs are highlighted and shown first, followed by the unfiltered glyphs.
Filter Font window by color flag»
New In the Font window sidebar, you can also double-click the new Flag section to see all the unique color flags assigned to glyphs in the font. The number on the color bar shows the numerical hue value, same as is used when you assign a flag via Custom…. The number next to the color bar shows the number of glyphs that have that flag.
Click the color bar or None to filter the Font window by the chosen color flag. To only see the filtered glyphs, turn on the Hide unfiltered glyphs toggle in the top bar. When the toggle is off,
the filtered glyphs are highlighted and shown first, followed by the unfiltered glyphs.
Named bookmarks in Font window»
You can use the Font window search box (at the top right) to find glyphs by glyph name, Unicode character name, script, Unicode codepoints, Unicode range, codepage or installed encoding. The search results create an ad-hoc filter.
When you enter a glyphtext into the search box (a Unicode string or a /-separated list of glyph names) and choose Text, you create an ad-hoc filter with glyphs that match that Unicode string or
list of glyph names.
Select some glyph cells and choose Text > Copy Text As > Unicode Text or /Names to create a suitable list in the clipboard, then paste it into the search box, choose Text and press Enter. Searches based on Unicode Text are more portable (you can use them on fonts with any names), but they don’t support glyph variants. Searches based on /Names work with all glyphs, but are limited to a specific glyph naming scheme.
FontLab remembers the history of your Font window searches in the Search history section of the sidebar. Click it to apply the filter. Drag a remembered search to the Bookmarks section to use the filter in future. This is a very fast alternative to creating encoding filters. The bookmarked searches are stored in your preferences. To remove a bookmarked search, click it and click the – button at the bottom.
New In FontLab 7.2, you can double-click a bookmarked search and give it a custom name.
Current instance in Font window»
The Font window cells can now display the current dynamic instance. See the Variations section of this document for details.
User interface»
Flatten Glyph and Flatten Layer»
To expand all filters and transformations, to decompose all components and to combine all same-formatted elements into a single contour element in the current layer of the current glyph or the selected glyphs, click the Glyph menu and choose Flatten Layer. To do this for all layers of the current glyph or the selected glyphs, Alt-click the Glyph menu and choose Flatten Glyph.
New FontLab 7.2 now has both Flatten Layer and Flatten Glyph in the Tools > Commands & Shortcuts dialog, so you can run either command in this dialog, and you can assign keyboard shortcuts to both commands independently.
Panels»
When a panel is undocked (floating), its title bar has a square toggle on the right side. Click this toggle to switch between three docking behaviors of that panel:
- Empty: the panel remains undocked. You cannot dock the panel inside a window or between panels or at the screen edge, and you cannot group the panel with other panels.
- Cross-shaped (
╋): you can dock the panel between panels or at the screen edge, and you can group the panel with other panels, but you cannot dock the panel inside a window. - L-shaped (
┓): you can dock the panel between panels or at the screen edge, and you can group the panel with other panels. In addition, if you’ve started FontLab with the setting Preferences > General > Tabs, you can also dock the panel inside a window.
New FontLab now remembers the state of the toggle for every panel between app restarts. It also saves this info in VFC/VFJ if Panels is on in Preferences > Save Fonts > Include. If Preferences > Open Fonts > VFC/VFJ > Restore > Panels is on, FontLab will restore the docking status of the panels.
New When a panel is active (is visible and has “focus”), you can now press CmdW CtrlW to close that panel.
Updated VFC/VFJ format»
New FontLab 7.2 uses an updated VFC/VFJ file format. In VFJ, the version of the main dictionary is now 9.
Warning
If you save/export a VFC or VFJ in FontLab 7.2, you may not be able to open it in an older version of FontLab. When you try to open the newer VFC in an older FontLab, in some cases the file will open, in other cases the file may not open and you will get a
Block parser exceptionerror. When you try to open the newer VFJ in an older FontLab, in some cases the file will open, in other cases the app may hang.
New FontLab 7.2 opens VFC files more than 2× faster.
Lib: font, master, glyph, layer»
New FontLab 7.2 lets you store and edit data that is specific to users, to specific projects, to external authoring tools, or is otherwise arbitrary: the VFC/VFJ files and the user interface provide access to a structure called the lib. In FontLab, a lib is expressed as a JSON structure that exists on several levels:
- font lib that holds data specific to the font as a whole; corresponds to the DesignSpace
libelement - font master lib that holds data specific to a font master, including data specific to the main font master; corresponds to the UFO
lib.plistfile - glyph lib that holds data specific to a glyph, and glyph layer lib that holds data specific to a glyph layer, including a glyph layer that corresponds to a font master; both correspond
to the GLIF
libelement.

Each lib is a dictionary (mapping table) of lib items. Each lib item includes a lib key that has a corresponding lib value.
A lib key is a string that typically consists of English uppercase and lowercase letters, digits and the period (.). If you create your own lib item, you should use a key that consists of a
reverse domain prefix followed by a descriptor of your liking. For example, if your domain is typerig.com, the reverse domain prefix would be com.typerig., so a valid lib key might
be com.typerig.DeltaMachine.widthRatio.
A lib value can be:
- string, example in JSON notation:
"John" - number, example:
30or1.5 - boolean,
trueorfalse - list (array), example:
[ "John", "Anna", "Peter" ] - dictionary (mapping table of keys and values), example:
{ "name":"John", "age":30, "city":"New York" }.
An item in a list or an item value in a dictionary can also be any of the above. In UFO, DesignSpace and GLIF, the lib is expressed using Apple’s XML property lists. FontLab uses [JSON], but these are just different syntaxes that express the same data.
For example the UFO lib:
<key>com.sometool.smartGuides</key>
<dict>
<key>unicodeCategory</key>
<string>Lu</string>
<key>contourCount</key>
<array>
<string>></string>
<integer>0</integer>
</array>
<key>glyphNamePattern</key>
<string>*.sc*</string>
</dict>is expressed in FontLab’s JSON as:
"com.sometool.smartGuides": {
  "contourCount": [
    ">",
    0
  ],
  "glyphNamePattern": "*.sc*",
  "unicodeCategory": "Lu"
},
You can edit the content of the font lib in File > Font Info > Font Lib, and the content of the font master lib in File > Font Info > Master Lib. To edit the glyph layer lib, use the Source panel.
The Font Lib and Master Lib pages of Font Info, and the Source panel are JSON editing areas that expect that you enter valid JSON. These editing areas will highlight the syntax of the JSON, and will check the validity of the content when you apply the changes. Use Preferences > Code editors to change the font size used in these editing areas.
JSON is enclosed within a pair of braces: it starts with a single { and ends with a single }. The JSON editing areas in Font Info and Source omit the enclosing braces and present the JSON content
that is inside them.
- When you paste content into FontLab’s JSON editing areas, don’t paste the enclosing braces.
- When you copy the content of the JSON editing areas to paste it into a standalone JSON file, add the enclosing braces.
DesignSpace+UFO projects and UFO packages»
Glyph ordering in UFO»
New When you open a UFO package, FontLab now opens the glyphs in the order specified by the public.glyphOrder key, and no longer moves the CR and space glyphs
to the beginning of the glyph order.
When you open a DesignSpace+UFO project, FontLab uses the glyph order of the main master.
Metrics expressions in GLIF»
New When you export UFO, FontLab 7.2 writes the metrics expressions into the GLIF lib as com.fontlab.metricsWidth, com.fontlab.metricsLeft, com.fontlab.metricsRight.
Previously, FontLab used non-prefixed lib keys width, lsb, rsb. FontLab reads both types of lib keys.
Auto layers in GLIF»
New When you export a font into UFO, FontLab 7.2 writes the auto layer status into the GLIF lib as com.fontlab.autolayer, and writes the auto layer recipe as com.fontlab.recipe.
FontLab also reads these lib keys.
DesignSpace, UFO and GLIF lib»
New FontLab 7.2 reads, stores and exports:
- the font lib that corresponds to the DesignSpace
libelement - the font master lib that corresponds to the UFO
lib.plistfile - the glyph lib and glyph layer lib that corresponds to the GLIF
libelement
When you open a DesignSpace+UFO project or a UFO Package, or when you import a GLIF file, FontLab interprets certain lib keys and converts them into native FontLab data. In those cases, FontLab does not store them in the FontLab lib.
When you export into DesignSpace+UFO or into an UFO package, FontLab exports the lib keys accordingly. New When the glyph and the glyph layer have a lib, FontLab will combine the libs on UFO export, with the glyph layer lib taking precedence for the same lib keys.
Warning
FontLab 7.2 does not read or export
libkeys for instance definitions in DesignSpace files.
PostScript hinting in UFO»
If your font had PostScript hints and you exported it into UFO Package, previous versions of FontLab stored the hints in the GLIF lib in the com.adobe.type.autohint format. This format was once used by AFDKO
but was problematic is no longer recommended: it used XML outside the Apple Property List namespace. Therefore, the GLIF files were, strictly speaking, not valid. Example:
<key>com.adobe.type.autohint</key>
<data>
<hintSetList>
  <hintset pointTag="">
    <hstem pos="0" width="140" />
    <hstem pos="560" width="140" />
    <vstem pos="50" width="160" />
    <vstem pos="360" width="162" />
  </hintset>
</hintSetList>
</data>
New FontLab 7.2 now exports hints in a more modern format public.postscript.hints, which is an official part of
UFO3. FontLab writes the pointTag key only if it is needed for hint replacement (the current UFO spec is not clear whether this key is required).
Example:
<key>public.postscript.hints</key>
<dict>
  <key>formatVersion</key>
  <string>1</string>
  <key>id</key>
  <string>4dfb94e2f06558a476220e...</string>
  <key>hintSetList</key>
  <array>
    <dict>
      <key>stems</key>
      <array>
        <string>hstem 0 140</string>
        <string>hstem 560 140</string>
        <string>vstem 50 160</string>
        <string>vstem 360 162</string>
      </array>
    </dict>
  </array>
</dict>
New FontLab now imports hints from the com.adobe.type.autohint.v2 structure, which is identical to public.postscript.hints, and also imports the older com.adobe.type.autohint format.
If you customize the UFO export profile and turn on Use legacy format version, FontLab will export version 2 of UFO, and will write the new-style hinting data, but it will use the com.adobe.type.autohint.v2 key.
TrueType hinting in UFO»
If your font had visual FontLab TTH commands and you exported it into UFO, previous versions of FontLab stored the TrueType Hinting commands in the GLIF lib in the com.fontlab.ttprogram format. This format
was problematic: it used XML outside the Apple Property List namespace. Therefore, the GLIF files were, strictly speaking, not valid. Example:
<key>com.fontlab.ttprogram</key>
<data>
<ttProgram>
  <ttc code="alignt" point="at01"/>
  <ttc code="alignb" point="ab01"/>
  <ttc code="alignb" point="ab02"/>
  <ttc code="doublev" point1="dv01" point2="dv02" round="true"/>
</ttProgram>
</data>
FontLab 7.2 still can read the old com.fontlab.ttprogram format, but it now exports visual TrueType Hinting commands in a new com.fontlab.ttcommands format. Example:
<key>com.fontlab.ttcommands</key>
<array>
<dict>
    <key>code</key>
    <string>alignt</string>
    <key>point</key>
    <string>at01</string>
</dict>
<dict>
    <key>code</key>
    <string>alignb</string>
    <key>point</key>
    <string>ab01</string>
</dict>
<dict>
    <key>code</key>
    <string>alignb</string>
    <key>point</key>
    <string>ab02</string>
</dict>
<dict>
    <key>code</key>
    <string>doublev</string>
    <key>point1</key>
    <string>dv01</string>
    <key>point2</key>
    <string>dv02</string>
    <key>round</key>
    <string>true</string>
</dict>
</array>
.glyphs files»
FontLab 7.2 can open the .glyphs files in version 2 and New in version 3 of the format. FontLab can only open .glyphs version 3 files saved in Glyphs 3 as a Glyphs File,
not as Glyphs File Package. Support of version 3 is experimental.
FontLab 7.2 can export .glyphs files in version 2 of the format, and you can open those files in Glyphs 2 and in Glyphs 3.
When you open a .glyphs file, FontLab 7.2:
- New reads the font custom parameters into the Font Lib, and assigns the
com.schriftgestaltung.fontprefix to them - New reads the master custom parameters into the Master Lib, and assigns the
com.schriftgestaltung.fontMasterprefix to them - New attaches all components that are automatically aligned in the
.glyphsfile - New imports the master custom parameters
hheaAscender,hheaDescender,hheaLineGapinto Font Info > Other Values - New creates sets various properties in Font Info > Other Values, including autohinting parameters, if the font contains multiple masters
New When you export into .glyphs, FontLab converts the lib keys with those prefixes into .glyphs custom parameters, and exports all attached components as automatically aligned components. New FontLab now exports the Font Info > Other Values entries for hhea as the appropriate .glyphs custom parameters.
Warning
FontLab does not perform validation of the content of the
com.schriftgestaltung-prefixed lib keys. Also, FontLab 7.2 does not read or export custom parameters for instances.
When you open a .glyphs file in FontLab, perform some editing, and export a new .glyphs file, you can later copy-paste instance definitions (with custom parameters) from the old .glyphs to the new in Glyphs.app:
- Open both the old and the new file in Glyphs.app.
- In Glyphs.app, open File > Font Info for both files and switch to the Instances tab.
- In Font Info of the old file, click the instances list, press CmdA, then CmdC.
- In Font Info of the new file, click the instances list, press CmdA, click the – button at the bottom, then press CmdV.
Exporting fonts»
New When you export a font into the built-in Web TT profile, FontLab now exports .woff2 and .woff, and no longer exports .eot. Previously, FontLab
exported .woff and .eot by default. If you need .eot, customize the profile and turn EOT: For IE (TT-only) on.
New The default profile for Variable TT no longer tries to export hinting. The export of hinting mostly failed, and in the few cases it worked, it caused problems with the Apple rasterizer. We’ll revisit this issue.
TypeRig & Delta Machine»
TypeRig is a powerful set of extensions for FontLab 7. It is developed by Vassil Kateliev.
TypeRig provides several plugins that extend the functionality of FontLab, see documentation. As Thomas Phinney put it: “If type design were fighting a classic Medieval war, TypeRig as an add-on is Iron Man’s armor. I mean, yeah, it’s armor, but it is way more than what anybody else even imagines armor doing.”
Note
TypeRig is not an official FontLab product. We do not offer technical support or assistance regarding usage of TypeRig.
If you’d like to financially support the development of TypeRig or you’d like to commission TypeRig-based custom scripts for FontLab 7, you can contact Vassil.
Install/update TypeRig»
To install or update TypeRig:
- Run FontLab 7
- Choose Scripts > Update / Install Scripts.
- Click OK in the dialog, wait until the installation completes.
- When you see the TypeRig is up-to-date dialog, click OK and close FontLab 7.
- If your macOS asks you to install the Developer Tools, install them.
- Start FontLab 7 and check the Scripts menu.
We recommend that you update TypeRig after you’ve installed FontLab 7.2, and occasionally update it afterwards.
TypeRig panel»

One major piece of TypeRig is the TypeRig Panel. It’s a multi-functional panel that allows you perform many operations in a multiple-master-compatible way. Change guides, metrics, metric expressions, anchors, elements. Perform various operations on nodes, contours and curves. Generate various texts and work with text blocks on Sketchboard.
After installing/updating TypeRig and restarting FontLab, open the Glyph window, select any glyph and choose Scripts > TypeRig GUI > TypeRig Panel. See the TypeRig GUI of the documentation for details.
TypeRig Delta Machine»

Another major component of TypeTig is Delta Machine, which implements the paper by Tim Ahrens (2008) “A Multiple Master based method for scaling glyphs without changing the stroke characteristics”, Digital Creativity, 19:2, 105-123, DOI: 10.1080/14626260802037445.
With Delta Machine, you can use compensating anisotropic interpolation to create condensed or wide masters, or derived glyphs such as small caps or sub-/superscripts.
Open the Glyph window, select any glyph and choose Scripts > Delta Machine > TR: Delta Machine. See the quick start documentation for details.
Other TypeRig plugins»
TypeRig also included additional plugins:
- TypeRig: Filter: apply and modify smart corners
- TypeRig: Kern: New copy/paste kerning, generate kerning lists
- TypeRig: Manager: import/export and modify kerning, kerning classes and other Font Info data
- TypeRig: Metrics: New perform auto-spacing
This video shows the most important aspects of TypeRig and Delta Machine.
Python API»
New There is a new FontLab Python API documentation on Github. The documentation is a work in progress, but is now updated and also
documents four packages: typerig, fontlab, fontgate and FL.
typerig»
New The TypeRig package includes the typerig Python package that provides a simplified, alternative “pythonic”
API to FontLab. TypeRig is written in Python. To use the typerig package, run FontLab 7, choose Scripts > Update / Install Scripts. Click OK in the dialog, wait until the installation
completes. When you see the TypeRig is up-to-date dialog, click OK and close FontLab 7. If your macOS asks you to install the Developer Tools, install them. Once the installation is complete, start FontLab
7 and check the Scripts menu.
fontlab and fontgate»
The fontlab package exposes most or all of the FontLab 7 GUI and high-level font-related objects. The fontgate package exposes more technical aspects of fonts, and does not include GUI functionality.
Some functionality is in fontgate, some in fontlab, but typerig abstracts and combines both packages. Both fontgate and fontlab are “bindings”,
i.e. they’re not true Python packages, but instead interfaces that you can use from within Python.
FL»
The FL package exposes a legacy API that is largely compatible with the old FontLab Studio 5 Python API. However, we no longer actively
develop it, and it’s only useful for very simple scripts.
PythonQt»
FontLab uses Qt, a cross-platform set of APIs for user interface development and interaction with the operating system. Qt provides a unified API whether you use macOS or Windows. The PythonQt package exposes the entire Qt API to Python. You can use it to build extensive user interfaces and access most aspects of the operating system.
The PySide2 by Qt: documentation is an alternative Qt-Python bridge, which is useful in exploring what you can do with Qt. Some details differ between PySide2 and PythonQt, so always check PythonQt documentation.
Anchors in Python»
New The FontLab Python API now exposes anchors, including their expressions. With TypeRig, you can access them via:
from typerig.proxy import *
g = pGlyph()
print(g.anchors())
Autokerning in Python»
New The FontLab Python API now exposes autokerning. With TypeRig, you can read the autokerned value between the A and V glyphs of the Regular master via:
from typerig.proxy import *
f = pFont()
print(f.fl.autoKern(f.fl.findName("A"), f.fl.findName("V"), "Regular"))
Preferences in Python»
New You can contol the new Preferences > Open Fonts > Round coordinates setting with fontlab.flPreferences.importRoundCoordinates.
from fontlab import *
pref = flPreferences()
pref.importRoundCoordinates = True
Lib in Python»
New You can access the font Lib and the Lib of the current master in Python:
from fontlab import *
print(flPackage(CurrentFont()).packageLib)
print(flPackage(CurrentFont()).masterLib)
Bug fixes»
-
Fix When a glyph has overlaps and uses smart corners and you export the font as OpenType TT, FontLab now correctly removes overlaps in that glyph.
-
Fix When you import several bitmap images into Sketchboard and move or resize some of them, FontLab no longer crashes.
-
Fix FontLab exports the glyph and glyph layer lib to UFO more correctly.
-
Fix When you edit the content of a glyph in the Source panel and click Apply, FontLab updates the glyphs correctly. Previously, FontLab only carried over the changes done to the glyph contours in the Source panel.
-
Fix When you define names for stylistic set features in the Features panel, and you later update them, FontLab now correctly exports the updated names into the
nametable of OpenType fonts. -
Fix When you export a font that has multi-color glyphs as OpenType+SVG, FontLab no longer loses the colors in glyphs that have components rotated by 90°.
-
Fix When you use Glyph > Fix FontAudit Problems on glyphs selected in the Font window, FontLab no longer crashes when some glyphs have problems that cannot be fixed automatically.
-
Fix When you perform Contour > Snap to Guides on glyph cells selected in the Font window, FontLab no longer crashes.
-
Fix When you decompose glyphs selected in the Font window, FontLab now correctly registers the operation in the History panel so it can be undone, marks glyph cells as changed, and enables File > Revert Font in menu.
-
Fix When Edit > Edit Across Glyphs is on and you make transformations to non-current glyph using the Rotate, Scale or Slant tool, FontLab now correctly applies the center of transformation. When you then undo, FontLab now undoes the transformations correctly.
-
Fix When you copy artwork in Adobe Illustrator and paste it in FontLab, and Preferences > Paste & Duplicate > Import original position is on, FontLab now correctly scales the pasted artwork according to the settings in the Fit artwork section.
-
Fix When you choose File > Save Font As and choose the VFJ format, and you subsequently modify some glyphs, FontLab draws a gray bar in the Font window cells for the modified glyphs, and makes the icon in the window title blue. When you save, FontLab now removes those gray bars and makes the icon in the window title gray. Previously, this worked with VFC but not VFJ.
-
Fix When you split a glyph layer into multiple elements, FontLab now correctly updates the appearance of the components in other glyphs that point to that layer. Previously, you had to re-open the file to see the correct appearance.
-
Fix When FontLab opens a
.glyphsfile, it converts aligned components to attached components more correctly. Aligned.glyphscomponents are classified as attached even if the source glyph layers have no anchors. This is to maintain roundtripping with the.glyphsformat. When you detach such a component, you cannot re-attach it. -
Fix When you make some changes to a font and click Forget history (×) in the History panel, and then close the font without saving, or you quit FontLab, the app no longer crashes.
-
Fix When you have open contours and you click with Pen tool on one end node and then another, FontLab once again joins the nodes.
-
Fix When you have Preferences > Variations > Preview master color > Bar on, and you change the current layer’s preview color in the Layers & Masters panel, the color of the bar at the top of the Glyph window updates instantly. Previously, you had to switch the layer to another and back.
-
Fix When you open the Elements panel and turn on Show/hide components and references and you make a base glyph (like
a) current, the bottom section of the Elements panel shows the composite glyphs that useaas one of the components. When you select these composites and click Copy metrics of current element to glyphs referencing it, the LSB and RSB are now copied correctly. -
Fix When you switch the master, the mini-previews in the Rules section of the Lookups panel update correctly. Previously, you had to hover over them.
-
Fix When you change the Actual Text Size in the property bar of the Glyph window Text mode, FontLab now correctly updates the corresponding numerical value in the Glyph window sidebar.
-
Fix If you have an element that is references in multiple glyphs, and in one of the glyphs you combine its contours with the contours of another element, FontLab now first unlinks that reference, so the other element references remain unaffected. Undo also works correctly. Previously, the content in all other references got emptied, and undo did not restore the previous state.
-
Fix When you click the + button in the Glyph window sidebar to save the current text in the predefined texts lists, FontLab no longer removes the default predefined texts. You can edit predefined texts in Preferences > Texts.
-
Fix If you have several glyphs in the Glyph window and Edit > Edit Across Glyphs is on, you can now drag nodes across multiple glyphs even if one of the glyphs uses smart corners.
-
Fix When you open a buggy
.glyphsfile that contains hints with a huge width, FontLab no longer hangs. -
Fix When one of the Play buttons in the Variations panel in on, and in the Glyph window you switch to a different glyph, FontLab now stops playing variations. Previously, FontLab turned off the Play button but the variations kept playing, and it was not possible to stop the playing.
-
Fix When you import features into the Lookups panel, FontLab now imports the lookups mapped to the
aaltfeature more correctly. -
Fix When you open a
.glyphsfile that contains certain custom parameters and open Font Info, FontLab no longer crashes. -
Fix FontLab no longer crashes when you have no open fonts and you click on Verify in the Tables panel. The button is disabled until you add some code to the panel.
-
Fix When you export a font with more than two axes into
.glyphsformat, the master locations on the 3rd axis are now written correctly. -
Fix When you set the Preview panel to Interpolation preview and you set your interpolation vector in the Variations panel Map view, when your font has more than two axes and you move the additional axis sliders in the Map view, the interpolation preview now updates correctly.
-
Fix FontLab no longer automatically generates feature code that fails to compile due to an empty language statement.
-
Fix Tools > Transform > Rotate 90° no longer rotates by 180°, and Rotate by 180° no longer removes the contour. Both operations work as they should.
-
Fix After you remove anchors using Tools > Actions > Remove Anchors, FontLab now correctly updates the Glyph window and the Anchors panel.
-
Fix When you use Tools > Actions > Guides & Anchors > Remove Anchors, you can select which anchors to remove in some glyph layers. Now when you use Tools > Repeat Remove Anchors, FontLab will now remove the same anchors. Previously, FontLab “forgot” which anchors you selected in the dialog, and Repeat Remove Anchors did not remove anything.
-
Fix When in Preferences > Save Files, Existing files is set to Rename and Save renamed files in subfolder is on, then if your file name includes square brackets (e.g.
MyFont-[wght].vfc) and you save the font, FontLab now correctly saves the backup files in theMyFont-[wght].backupsubfolder. -
When your VFC/VFJ , you have set , FontLab now correctly no longer fails to save the font with backup file in a separate folder.
-
Fix When you change the width, LSB or RSB values in the Glyph panel, the Glyph window no longer temporarily hides the visible guides.
-
Fix When you create an anchor with the x expression
width, and you move the RSB line in Contour mode, the anchor now moves to the new location. Previously, it only moved when you switched to Metrics mode. -
Fix Auto layer recipes now accept anchor names that include dots, e.g.
=dotlessi + dotaccentcomb@top.LCwill work. -
Fix When you open a VFC/VFJ and a glyph layer contains a width expression such as
=480, FontLab correctly updates the actual advance width to that value. -
Fix When you are typing an expression into a spacing control field in the Glyph window, FontLab displays in blue the difference between the current value and the value yielded from the expression. FontLab now no longer displays that difference underneath the text that you are typing.
-
Fix If a glyph layer in a multi-master font has both contour elements and components, and you use Tools > Autohint, FontLab no longer produces varying results depending on whether Edit > Match when Editing is on or off.
-
Fix When you turn on View > Scoreboard and move a node or anchor using an ←↑↓→ key, the Scoreboard now shows the position. Previously, Scoreboard only shows the position when you dragged a node or anchor.
-
Fix When you have multiple glyphs in the Glyph window and you double-click a component in an inactive composite glyph, the property bar now instatly shows the properties of the component. Previously, you had to de-activate the component and activate it again.
-
Fix When a glyph contains both an element reference and a component and you create new intermediate master between two existing masters, FontLab no longer changes the order of elements in this new master.
-
Fix If Preview interpolation is on the Preview panel and you toggle one of the auto-matching options in the Variations panel, FontLab now instantly updates the Preview panel content.
-
Fix When the option Always create [mark/mkmk] code is turned on in the export profile, FontLab no longer fails to compile the
GSUBOpenType features on export. -
Fix When you have fractional font guides and Round coordinates is off, and you open Font Info, the font guides no longer get silently rounded to integers.
-
Fix When you open a VFC or VFJ that has stored glyph windows and switch to one of these windows, the master switcher in the Glyph window property bar shows correct content.
-
Fix When you set Preferences > Operations > Use names to uniXXXX and rename a glyph manually to something like
f.1, FontLab no longer renames it touni0066.1but uses the name you entered. -
Fix The default UFO Package export profile in FontLab does not round coordinates to integers. When you export instances or a font that has fractional coordinates into UFO using the default export profile, FontLab exports coordinates of nodes, handles, hints, and anchors, as well as hint widths, in fractional precision. When you customize the UFO Package profile and set Round coordinates to UPM grid > Round nodes and handles to integers, and export instances or a font that has fractional coordinates, FontLab 7.2 now rounds to integers the coordinates of nodes, handles, hints, and anchors, as well as the hint widths. Previously, the anchor coordinates and hint coordinates and widths were not rounded.
-
Fix Contour > Coordinates > Apply Rounding and Tools > Actions > Contour > Apply Rounding now correctly round fractional positions of components to integer coordinates.
-
Fix When you choose File > Export > OpenType PS > Customize > Round coordinates to the UPM grid > Keep fractional nodes and handles, turn on Round coordinates to the UPM grid and export Instances, FontLab now exports hints in fractional precision, just like nodes and handles. Previously, it rounded hints to integers, which created a mismatch between hints and points.
-
Fix When you choose File > Export > UFO Package > Customize > Round coordinates to the UPM grid > Round nodes and handles to integers and export Instances, FontLab now rounds hints to integers. Previously, it only rounded point positions and anchors.
-
Fix When you turn on Contour > Coordinates > Round when Editing, choose Font > Generate Instance > Regular > Create as Font, FontLab now rounds hints to integers. Previously, it only rounded point positions and anchors.
-
Fix When you turn on Contour > Coordinates > Round when Editing and open a UFO package or an OTF that contains fractional coordinates, the Coordinates Rounding warning dialog appears. If you choose Round, FontLab will now round to integers not only the nodes and handles but also anchors and hints.
-
Fix If a feature contains invalid positioning rules, FontLab now ignores them when it decompiles the
GPOStable. -
Fix When Contour > Coordinates > Round when Editing is on and you move power guides, the coordinates of the intermediate nodes are now integer. FontLab now also produces integer coordinates in contours that are linked to power guides when you choose Contour > Coordinates > Apply Rounding
-
Fix When you fix the FontAudit Flat Curve problem in particular glyphs, FontLab no longer crashes.
-
Fix When you have multiple fonts open and you turn on Preview interpolation in the Preview panel sidebar, then you switch to another font and turn on Preview interpolation again, the Preview panel now shows interpolation for the correct font.
-
Fix If the only layer in a glyph is a layer marked Service and you export the font to a final format, FontLab now exports the glyph with the advance width of that layer but without any content. Previously, FontLab incorrectly included the content of the service layer in the exported font.
-
Fix When you open a VFC, the Font window sidebar Layers & Masters > Mismatch section now correctly filters the glyphs that don’t have matching masters. Previously, that filter occasionally showed fales positives until you clicked Refresh next to it.
-
Fix When you close the last-open font, the Source panel no longer keeps the content of the just-closed font.
-
Fix When you have features applied to the Glyph window, you select the text in Text mode and choose Edit > Copy Text As > /Names, FontLab no longer incorrectly repeats the glyph name of a ligature as many times as the ligature had components.
-
Fix ShiftAlt-drag a tangent node to move it, the tangent node slides along the line segment correctly, i.e., retains its handle direction even when it approaches another tangent point.
-
Fix When you have some non-standard values in the Transform panel, and you open a font and then open a Glyph window and you click Apply in the panel, FontLab correctly applies the transformation to the current glyph. You can now also correctly undo this operation. Previously, this was unpredictable.
-
Fix When you were editing a glyph in the Glyph window, Edit > Select All occasionally stopped working so the only way to select all contents was by marquee. This is now fixed.
-
Fix When you open a UFO package, FontLab 7.2 correctly reads the PS hints stored in the
com.adobe.type.autohintGLIFlibelement, as FontLab 7.0.1 and earlier did. FontLab 7.1 ignored those hints. -
Fix FontLab for Windows no longer crashes due to the OpenGL problems on some older video adapters when trying to open the Glyph window.
-
Fix When you copy one Font Info page from one font to another using the Copy to Fonts button, FontLab no longer puts confusing error messages in the Output panel.
-
Fix When you copy glyphs in the Font window and paste them into the text string in the Preview panel, FontLab no longer crashes.
-
Fix When Rebuild existing glyphs was off in the Generate Glyphs dialog, FontLab always selected the Current master setting. Now, FontLab restores the previously remembered selection.
-
Fix When you add or edit kerning moving the second glyph in the pair with arrow keys, FontLab no longer occasionally crashes.
-
Fix The built-in
alias.datrecipes fortwothirdsandonethirdare now more correct. -
Fix When you export an OpenType font with digital signature (DSIG table), FontLab no longer exports an extra font file with a dummy DSIG table.
-
Fix When you hold Alt and scroll the mouse wheel over the Preview panel canvas, the panel now changes the font size as intended.
-
Fix The Edit > Find Outline… dialog now shows the copied contour correctly even if the font has a UPM value other than 1000.
-
Fix Preview interpolation is on in the Preview panel and you move sliders in the Variations panel, the interpolation preview updates correctly.
-
Fix When Font Info > Other Values > Unfill looped corners is on, and Preview interpolation is on in the Preview panel, FontLab no longer renders the outer loops as filled in the panel.
-
Fix When you perform an operation on a glyph and then undo it, FontLab no longer erroneously hides in preview glyphs that have the same element references as the affected glyph or use the affected glyph as components.
-
Fix When Edit > Edit Across Elements is on, you select contours that belong to different elements, transform them (Flip, Scale, Rotate) and then undo, FontLab now correctly undoes the the transformation in all affected elements.
-
Fix In Font Info > Names, when you click the Auto button for the Master name, FontLab now correctly updates the field using the Style name. Make sure to click Apply after renaming!
-
Fix When you open the Scripting panel and there, open the Console section, and paste some code in there, FontLab no longer pastes the code as rich text.